

Table of Contents
The dragon demands ETB triggers in this edition of Brewing In A Top Hat! I have been jamming Terror of the Peaks into every deck it can fit it into since its release, and I think I’ve finally refined two lists: One Historic and one Standard, both of which will blow your socks right off!
[sd_deck deck=”laMpYs7jj”]
In this list, Terror of the Peaks finds a best friend in Mirror March. The idea is to ramp up to your Mirror March, and then play as many creatures as you can to maximize the chances you get a huge heads-streak. Let’s take a look at the card selection and talk about some of the fun interactions and synergies this deck has, then we’ll talk about math. I know, you’re on the edge of your seats!
The Card Choices

Explore/Growth Spiral: Remember that if you have both in hand, it is better to play Growth Spiral first. Explore is better later in the game, since it lets you play more lands off of Escape to the Wilds.
Tangled Florahedron: Yes, you can use these as early rampers or lands, but don’t underestimate dropping one with a Mirror March out. Its elemental creature type can trigger Risen Reef and the copies it makes have haste, so there is a 12.5% chance that if you play it with a Mirror March out, it will generate more mana than it costs. Stonks!
Risen Reef: I added Yorion as my companion after accidentally decking myself out after flipping six heads off of my Reef friend once.
Cultivate: Yes, this is a bit of a boring card, but guaranteeing that we get to five lands is important in this deck. Five is where we can play Escape to the Wilds, which is what enables us to get huge tracts of land advantage, and makes the whole deck click. So don’t cut these for more creatures.
Uro, Titan of Nature’s Wrath: With Terror of the Peaks out, Uro is also a 3 mana deal 6 damage to any target. Because I didn’t think he did enough when he came into play as is.
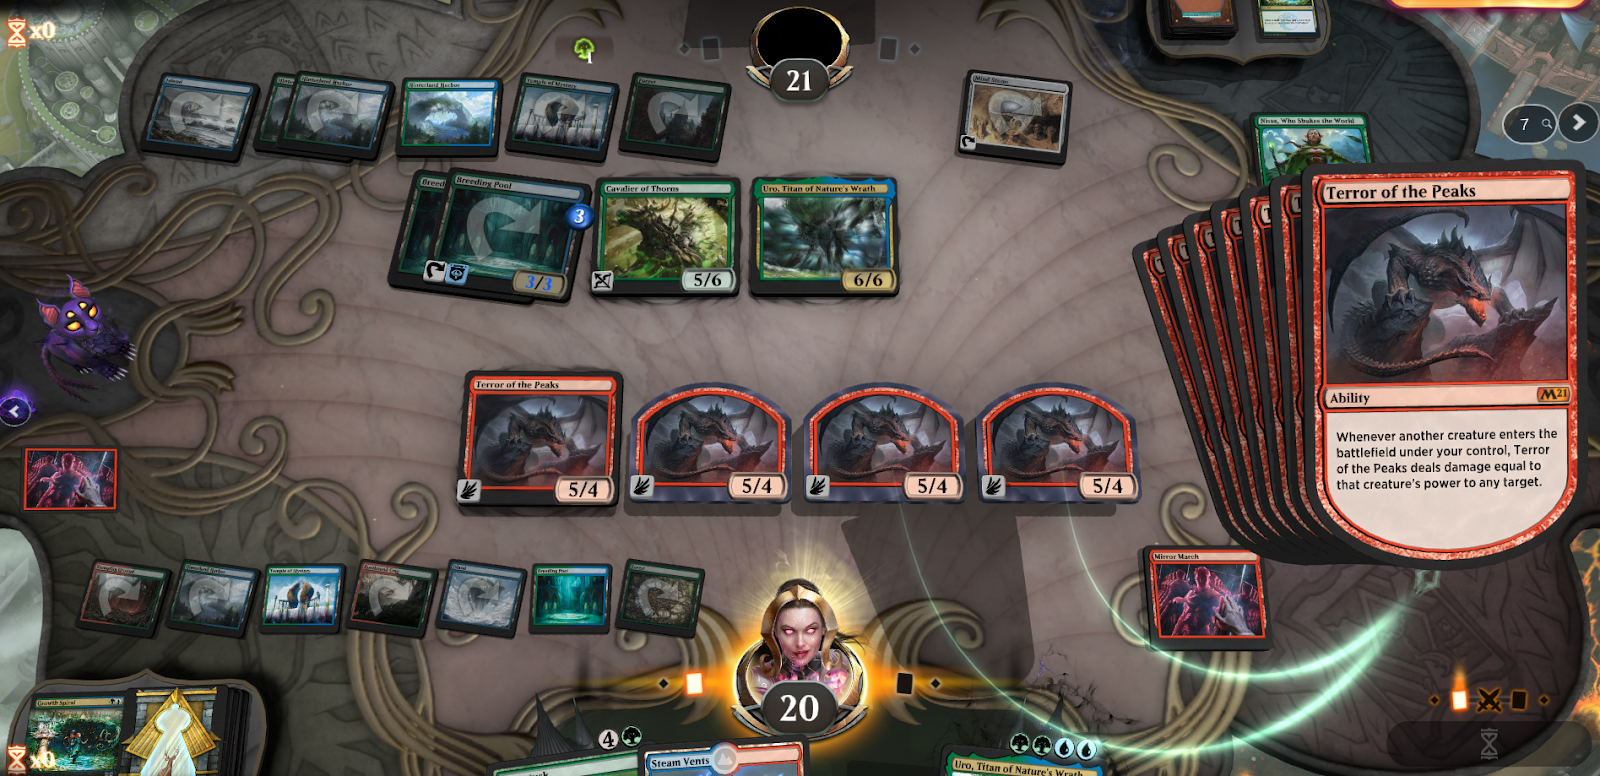
Terror of the Peaks: The big Dragon himself. This is your win condition, because every time he enters the battlefield with Mirror March out, he has a 25% chance to deal 20 damage. Two heads is all it takes.
Thragtusk: Swagtusk plus Mirror March can bring you back from the brink of death. Not only does the life gain help you stabilize against aggro, but the tokens you made each make their own 3/3 beasts when Mirror March triggers on your end step.
Escape to the Wilds: Uro and Growth Spiral can’t play lands from exile, so remember to try to play the lands that this hits first.
Mirror March: Better coin flip simulator than standard best of one. Zing!
Genesis Ultimatum: For just seven mana, you too can attempt to live the dream of hitting a Mirror March and one or more creatures, and explode the state.
Turntimber Symbiosis: This is mostly a land, but sometimes you really need to dig for any creature. Late in the game, this can be a devastating top deck.
Yorion, Sky Nomad: Yorion adds some very complicated lines of play to this deck. If you flip any heads, he can exile himself. Then, when he comes back, he can make more copies, and exile himself again to come back at the end of your opponent’s turn. Also you will have to choose which copy stays alive when making tokens, so don’t accidentally mess up the triggers. Play slowly until you learn what to expect. It can get to be a bit of a mess with all the triggers.
The Math
I’m just gonna go over the very basic probability of flipping coins in a row. Each coin you flip has a 1 in 2 chance of being heads, as does the next one. So the formula to follow is (½)x=y% X is how many flips, y is the probability of it happening. Here is an example:
Let’s say your opponent has 20 life and you have 10 life. You have a Mirror March and six lands out, and a Terror of the Peaks and Thragtusk in hand. Your opponent’s board has only a Giganotosaurus on it, meaning they will attack for lethal next turn. What is the play?
Well we can try to win with the Terror of the Peak, but we would need to flip 2 heads in a row to do 20 damage, (½)2=25%. That means you have a fifty percent chance to deal 10 damage (including your attack), a twenty five percent chance to win the game, and a fifty percent chance to have to chump block with your Terror of the Peaks. High risk, high reward.
Or we can try to win the game with the Thragtusk. We would need 5 heads to win. (½)5=0.03125% That means you have a 100% chance to survive the next turn while hanging on to your win con, and a 3ish% chance to win the game, along with several, safer middling options. Lower risk, lower chance at payoff.
Now, how do you use that information? Well you need to add more context. Is it game one, two, or three? If it’s game two and I just won game one, I would play the Terror of the Peaks. If it’s game three, then I wouldn’t risk the whole match on it. I would play the Thragtusk.
The last bit I want to add is based on a basic principle of probability: the more events there are, the more opportunities there are for stringing together multiple heads. So, the more creatures you play, the more chances you have to get that legendary string of heads.
Sideboard Guide
Goblins
| In | Out |
|---|---|
| +4 Aether Gust +4 Storm’s Wrath +4 Grafdigger’s Cage | -4 Uro, Titan of Nature’s Wrath -4 Risen Reef -3 Genesis Ultimatum -1 Tangled Florahedron |
Since we are bringing Grafdigger’s Cage to help combat Muxus, Goblin Grandee, we need to take out the cards that it stymies. We also bring in 4 board wipes to help deal with their flood. Remember that if you can Aether Gust after they sacrifice all their Goblins to Skirk Prospector, it is usually back-breaking enough to win the game.
Jund Sacrifice
| In | Out |
|---|---|
| +4 Storm’s Wrath +4 Grafdigger’s Cage | -4 Risen Reef -3 Genesis Ultimatum -1 Tangled Florahedron |
We leave Uros in, even with the Cages, because the ramp and life gain are still really important, and if we don’t draw our cages, we know they won’t be using any. Board out the Risen Reefs, because they are too easy to pick off with Mayhem Devil/Claim the Firstborn.
Control
| In | Out |
|---|---|
| +4 Storm’s Wrath (if they have planeswalkers) | -1 Uro, Titan of Nature’s Wrath -3 Tangled Florahedron |
This is the nightmare matchup for us, but luckily there isn’t too much of it around right now. Your best bet is to out ramp them and try to stay ahead of them in cards. If Mirror March is out, it doesn’t matter if they kill the creature you play. You are just attempting to get lots of heads and knock them out in one turn.
Rakdos Arcanist
| In | Out |
|---|---|
| +4 Storm’s Wrath +4 Grafdigger’s Cage | -4 Risen Reef -3 Genesis Ultimatum -1 Tangled Florahedron |
We play this match up similarly to Jund Sacrifice. They really struggle with Grafdigger’s Cage, so play it immediately. Don’t let it sit in your hand, or it runs the risk of being discarded.
Neostorm
| In | Out |
|---|---|
| +4 Aether Gust +4 Grafdigger’s Cage | -2 Thragtusk -3 Genesis Ultimatum -1 Uro, Titan of Nature’s Wrath -2 Risen Reef |
This matchup is all about not letting them combo. Getting out Cage will do the trick, but so will Aether Gusting their Neoform. You want to hit the original Neoform, so that they get one copy and then their dual caster mage fizzles.
Other Cards and Budget Options

Here are some other cards that I tried and evaluated for you. Some were playable and some, not so much. Adjust for your own collection to craft the version that works best for you, without blowing all your wildcards.
Thassa’s Oracle: If you want to build a self-mill strategy with your Risen Reefs, you need this for the win condition. Plus each one you make with Mirror March adds two more devotion, so if you flip well enough it’s a two card win. Blow your opponent out in a whole new way!
Cavalier of Thorns: Very solid in the self mill strategy, as it not only loads up your graveyard, but can pull back a win condition. Still, that triple green can be a tall order.
Thassa, Deep-Dwelling: A solid way to add more flips, but a bit weak before it. I dropped it because it felt like a win-more card, but those can be fun.
Cloudkin Seer: This is a decent budget option that has elemental synergy with Risen Reef.
Glasspool Mimic/Mirror Image: I used these to replace cards I wasn’t sure I wanted to craft and they worked so-so. However, in my opinion, they are not worth the times they are a dead draw.
Demanding Dragon: The poor man’s Terror of the Peaks.
Elvish Rejuvenator: Decent, but Risen Reef is just better because it doesn’t ever miss.
Llanowar Visionary: This was the last cut I made and it’s a really solid budget option. Draw cards, make mana, play those cards you just drew; at least, if you flipped really well.
Pelakka Wurm: The poor man’s Thragtusk.
Omnath, Locus of the Roil: No, not that Omnath. If you want to lean more heavily into the elemental package, you should probably fit 1-2 of these.
Hornet Queen: Good? No, too expensive. But are you playing this deck because it is good or because it is fun? Spam the Swarm Rise emote and cover your opponent in bees, you cheeky devil.
Craterhoof Behemoth: Oh you’re a Timmy? How does a bunch of exponentially growing beasts tickle your fancy? Experience going bigger than you ever dreamed of!
[sd_deck deck=”tjw6–Olw”]
The Standard list abuses a different way of making lots of tokens with Terror of the Peaks: Scute Swarm.
The strategy is to get a Terror of the Peaks out with a Scute Swarm, then Mutate a Migratory Greathorn on top of the Scute. This will pull out a land, which will make another copy of the Greathorn-Scute. First land does 3, second does 6, third should kill.

The Card Selection

Gilded Goose: Having access to a one-cost mana dork is powerful enough on its own, but we can Mutate on top of it to make a bigger flyer too! Prioritize opening hands with this in it, because having it on one means we can play a three drop on turn two. We have so many three drops. I miss Llanowar Elf.
Tangled Florahedron: I like having ramp in the two-drop slot, and this little guy can double as a land. You wouldn’t be wrong to replace this with Lotus Cobra or Ilysian Caryatid, but I like the flexibility this little elemental gives us.
Valakut Exploration: This is our secondary win condition. It also can get some good chip damage in early, so that later on our bigger stuff can kill sooner.
Bala Ged Recovery: Usually this will be a land, but just in case Valakut Exploration dumps something to the graveyard that we need, we can pull it back with this.
Garruk’s Harbinger: With Omnath leaving the format, black is back in a big way. Having a Mutate target with hexproof from black is huge in this Dimir and Rakdos-filled meta. Mutate loves cards with big text boxes.
Cultivate: The ramp it puts into play is good, but the one it puts into hand so that you can get another landfall trigger the following turn is the main reason we play this over cards like Fertile Footsteps, Roiling Regrowth, and Scale the Heights.
Scute Swarm: This six-legged, game crasher is our game-ender. If your opponent can’t answer when you play him, it should spell victory. Just make sure you don’t go overboard and crash your game. That would be a silly way to accidentally punt a match that I certainly have never done by accident, no sir.
Migratory Greathorn: Mutate this onto Scute to go off. Each one you Mutate makes another, and, unless they immediately can kill both of them, you will reach critical mass, especially if you can double Mutate. If you have a Terror of the Peaks out, each split does exponential damage.
Terror of the Peaks: When trying to combo for the win, sometimes it’s better to lead with Scute Swarm, and other times it’s better to lead with Terror of the Peaks. It all depends on the type of interaction your opponent is using. Against damage based removal, start Terror. Against spot removal or counter spells, start Scute.
Auspicious Starrix: This is our secondary win condition. Mutate on top of a Terror of the Peaks and, if you dump out a creature, it will deal damage. Mutate on top of a Scute, or better still a pre-Mutated Scute to get really greedy. Sometimes if you hit the right cards, like lands + Valakut Exploration, you can one-turn kill them.
Turntimber Symbiosis: Most of the time this is a land, but sometimes you really need to dig for any creature. Late in the game this can be a devastating top deck. It can even turn a Goose into a real threat.
Shatterskull Smashing: Some mainboard removal that isn’t Terror of the Peaks is important; being a red source that can come into play untapped doubly so. However, being “4 mana, kill 2 cobras” is why this card makes the 75.
Sideboard Guide
Rakdos Midrange
| In | Out |
|---|---|
| +2 Garruk’s Harbinger +1 Klothys, God of Destiny +2 Scavenging Ooze | -4 Tangled Florahedron -1 Bala Ged Recovery |
Hexproof from Black is enough against most of the popular versions of the list to make Garruk’s Harbinger a very good card to try to prioritize in your opening hand. Don’t write off the life gain that Scooze and Klothys provide us with, as it can be a lot for them to handle. You want to use your excess green mana to remove cards from their graveyard with Scooze, even if it isn’t a creature. Everything in their bin is escape-fodder for Kroxa, so keep it empty.
Mono Green Stompy
| In | Out |
|---|---|
| +2 Storm’s Wrath +2 Everquill Phoenix | -4 Valakut Exploration |
We need to be faster and more resilient against their onslaught of largeness. They don’t have a ton of interaction, but you need to protect your life total. This deck has reach and can take you down when you think you’re safe. Keeping a decent board is important.
Dimir Control
| In | Out |
|---|---|
| +3 Destiny Spinner +2 Everquill Phoenix +2 Garruk’s Harbinger +2 Gemrazer | -4 Auspicious Starrix -4 Turntimber Symbiosis -1 Shatterskull Smashing |
Our high-cost spells will never land against them, so we board them out for creatures. Try to get a Destiny Spinner out and keep the creature pressure up. Gemrazer goes in if they have Sharknados and/or Ashiok’s Erasures. If not, leave in 1 Turntimber and 1 Shatterskull.
Other Cards and Budget Options

Here are some other cards that I tried and evaluated for you. Some were playable and some, not so much. Adjust for your own collection to craft the version that works best for you without blowing all your wild cards.
Porcuparrot: Definitely a win-more card, but I have to say making a million Mutated parrots and blasting them in the face is pretty funny. Squawk!
Bonecrusher Giant: Phenomenal stats and removal. Great substitute, and you probably crafted them already!
Shatterskull Charger: If it weren’t for the double red in the cost, this might have made the cut. It provides early pressure and recurrable 4 damage once you get Terror of the Peaks out.
Llanowar Visionary: Good budget card in any deck that wants to ramp, but the crowded three drop spot kicks it out.
Azusa, Lost but Seeking/Dryad of the Ilysian Grove: I didn’t like them because I kept running out of lands before I could activate Scute. They put me in this awkward spot of either holding lands back (in which case why have these out?) or risk running dry when I was ready to Scute. Cultivate is much better, and doesn’t cost rare wildcards. Plus Azusa is a human so she can’t Mutate.
Thrashing Brontodon: Budget replacement in the sideboard for Gemrazer.
Beanstalk Giant: This is a great budget finisher that ramps early. Bring it down late game with a Terror of the Peaks to blast your opponent in the face for huge damage. Weaponize all that ramp!
Questing Beast: Not really a budget option per se, but you may have already crafted them. It has so much text that it just keeps going. We love that as a Mutate target. Did you know that its combat damage can’t be prevented? Protection from green doesn’t even work! Did you know its deathtouch auto-kills planeswalkers? It doesn’t, but the fact that you had to think about it for a second shows just how much text they jammed on that thing.


