Historic #1 Mythic Mono Red Laelia Burn Deck Guide: Incinerate Your Opponents
Once again Altheriax hit number one and this time with a strategy that hasn't seen play in awhile: Burn! Find out why Laelia makes Burn viable again and his best sideboarding tips and tricks for every popular matchup!
Hey everyone! Today I’m going to be covering my Mono Red Laelia Burn deck in Historic which I recently used to go 21-4 and hit rank #1 with on the Arena ladder.
Burn has been largely absent from the Historic metagame for a while now, mainly due to the awful matchup it had against Cat/Oven sacrifice decks, but with the recent nerf of A-Cauldron Familiar, and the addition of Laelia, the Blade Reforged from Historic Anthology 6, it feels like it’s finally time for burn to make it’s return.
I’ve also put up a video on my YouTube channel with with 5 matches of game play if you’re interested in seeing the deck in action.
If you’ve never played a burn deck before, the deck is largely comprised of threats (mainly creatures) and burn spells (instants and sorceries that can deal damage to any target). The big advantage of running a deck full of burn spells is that it gives you great flexibility – you can use them to kill creatures (to clear the way for your creatures to attack), pick off Planeswalkers, or just deal direct damage to the opponent.
This also gives you great reach in the late game since you can deal direct damage to the opponent, meaning you don’t have to rely on your creatures attacking, and you can always win the game once the opponent is at a low life total regardless of how behind you are on the board.
The flexibility also makes burn decks like this one pretty difficult to play optimally, because firing off a burn spell at the wrong time or the wrong target even once can end up losing you the game, but it’s one of the most fun decks tp figure out and learn in my opinion.
Play with Fire & Shock: These both essentially do the same thing, but Play with Fire is slightly better since it scrys when you deal damage directly to the opponent. Most burn decks don’t normally run this many 1 mana deal 2 damage spells, but I’ve found it very important for a couple of reasons.
First, there are a bunch of cheap creatures in the format that are very important to be able to kill immediately on turn 1 or 2, and running 8 of this effect gives you a pretty high chance of being to do so. Esper Sentinel and Thalia, Guardian of Thraben are quite popular and being able to kill them on turn 2 (without giving them a draw off Esper Sentinel) is very important, killing the Auras creatures before they can start growing them, especially on the draw is very important, being able to kill Llanowar Elves or Elvish Mystic on turn 1 against green decks is very important etc – the list goes on!
Second, the deck has a lot of cards that exile a card from your library that you can only play this turn and running a high density of cheap burn spells maximizes your chances of this card not going to waste because you don’t have the mana to cast it. Electrostatic Blast, Laelia, the Blade Reforged, and Chandra, Dressed to Kill are all cards that do this, and often times you’ll only have one spare mana when you do, which means if you were running a higher density of more expensive burn spells, the chance of you whiffing are much higher. We also have Light Up the Stage which exiles cards until your the end of your next turn, but we often play this on turn 2, and so it’s still useful to have a high density of cheaper burn spells to maximize our chances of being able to cast both of the cards we exile.
Electrostatic Blast: One of my goals with this deck was to ensure that the deck had a lot of cards that help you refuel so you very rarely run out of gas, and Electrostatic Blast is great as it doubles as both burn and a way to refuel.
Having a lot of ways to refuel also helps to enable running more cheap burn spells – traditionally one of the issues of running a lot of cheaper burn spells is that you can run out of gas quickly if you empty your hand, but cards like Electrostatic Blast (and Laelia, the Blade Reforged, Light Up the Stage, and Chandra, Dressed to Kill that I’ll get to later) really help to ensure that doesn’t happen.
Sequencing your spells with Electrostatic Blast is very important, or you could end up in a situation where you aren’t able to cast the spells you exile with its ability. You ideally want to use this as the last spell during your opponent’s turn (or the last spell during your turn if you don’t plan on casting anything during the opponent’s turn) so that you can trigger the exile effect of Electrostatic Blast at the beginning of your next turn, when you have a lot of mana available. Triggering the exile effect during the opponent’s turn is usually a bad idea (since you’ll only be able to cast instants you exile) so always think and plan ahead when using Electrostatic Blast.
Static Discharge: This is potentially the strongest burn spell in the deck – 3 damage to any target for 2 mana is a reasonable rate, but being able to then deal 4, 5, and 6 damage once the intensity starts ticking up is way above rate. It’s also very important having a relatively cheap burn spell that’s capable of dealing 3 damage since all of our other main deck burn spells only deal 2.
Since we have a lot of ways to refuel, we usually don’t mind using multiple burn spells to kill a bigger creature if we need to, but it’s always a bit awkward doing that to kill a 3 toughness creature, especially something like Ledger Shredder. Static Discharge helps to remedy this, and we also have extra burn spells in the sideboard that are much more efficient at killing bigger creatures games 2 and 3 in matchups where that’s important.
A-Dragon's Rage Channeler: This is great at filtering through the top of the deck to dig towards whatever we need at the time, which makes our ways to refuel much more effective since we’re less likely to brick when we’re surveilling with A-Dragon's Rage Channeler.
We also have multiple card types in the deck so getting delirium online is fairly easy – this then turns A-Dragon's Rage Channeler into a 3/1 flyer which can force through a lot of damage against decks that can’t block in the air.
The thing I really like about A-Dragon's Rage Channeler is that it’s great in the early game at helping us dig for what we need, and it’s also great in the late game once we have delirium online and it can help us string together multiple burn spells in order to kill the opponent.
Soul-Scar Mage: The prowess on this is great at being able to force through additional damage when combined with our burn spells and the ability to turn our burn spells into -1/-1 counters is great because it means we’re able to deal with bigger creatures over the course of multiple turns. The two abilities combined also makes combat incredibly difficult for the opponent since we can simultaneously shrink their creatures and buff the Soul-Scar Mage with prowess using our burn spells.
Kumano Faces Kakkazan: This provides a lot of value in different ways which is great for a 1 mana card. The first chapter provides chip damage that can also be used to pick off low loyalty planeswalkers and it’s also an easy way to trigger spectacle for Light Up the Stage which is great.
Then on the third chapter, it transforms into a 2/2 with haste that can immediately start pressuring more damage and also acts as pseudo graveyard hate which is great against creatures like Arclight Phoenix.
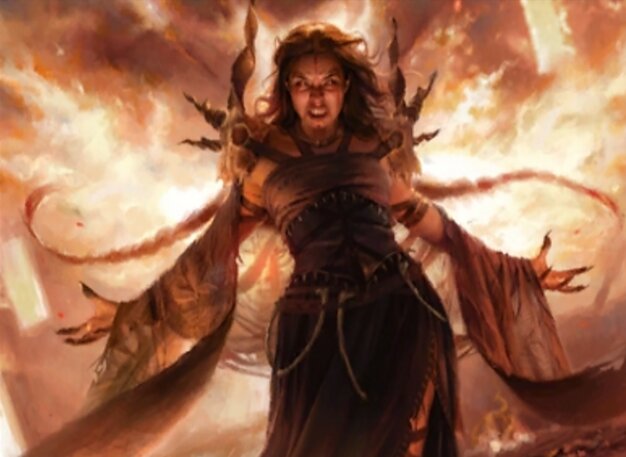
Laelia, the Blade Reforged: This is a new card from the latest Historic Anthology and I’ve been so impressed with how powerful this is, especially in a burn shell. It being a haste creature means it immediately starts getting in for damage the turn you play it, it also provides card advantage each turn, and grows very quickly!
It being a 2/2 does make it vulnerable to cards like Unholy Heat, but it immediately grows to a 3/3 and out of range if they don’t have instant speed removal before we attack. It obviously triggers itself to grow each turn, but we also have a lot of other ways to give it +1/+1 counters too – we exile cards from our library with Light Up the Stage, Chandra, Dressed to Kill, and Electrostatic Blast, and we can exile cards from the graveyard to trigger it games 2 and 3 with Unlicensed Hearse and Soul-Guide Lantern, so it grows really fast in this deck.
The fact it provides card advantage each turn also ensures we don’t run out of gas, and since the curve of the deck is so low, we’re usually able to cast whatever we exile, even if we need to play other spells the same turn. It also works perfectly in a burn deck since we’re happy to play whatever we exile – if you were running it in a midrange deck instead, there will be situations where you exile creature removal when the opponent has no creatures, or discard spells when the opponent is empty handed, whereas we can always make good use of whatever we exile in this deck.
Light Up the Stage: This is another really efficient way of refueling since it’s very easy for us to trigger spectacle off our creatures attacking, burn spells, or chip damage from cards like Kumano Faces Kakkazan or Chandra, Dressed to Kill. Since the curve of the deck is so low, we can confidently play this on turn 2 and not hit any uncastable cards, and we’re almost always guaranteed to be able to play both cards we exile later in the game too.
Chandra, Dressed to Kill: This is another card I’m a huge fan of in burn decks, and I’d be running more copies in the main deck if it weren’t for Laelia, the Blade Reforged. The +1 to deal a damage and add a red mana is great at allowing us to ramp, picking off planeswalkers, and easily enabling spectacle on Light Up the Stage while also providing an additional point of direct damage each turn.
The other +1 provides us with repeatable card advantage which is great at ensuring we don’t run out of gas and can help us pull ahead in grindy matchups. The ultimate also comes up a fair amount and will almost always win you the game if you reach it.
In grindier matchups like midrange and control, they’ll typically tend to board in more creature removal against you which can mean they’re lighter on ways to deal with Chandra, Dressed to Kill, so an effective way to win those matchups is drop Chandra, Dressed to Kill on turn 3 and just defend it until the ultimate since you only need to protect it for 3 turns to reach it.
Mana Base:
22 lands is probably slightly on the higher side for a burn deck, but we really want to ensure we hit our third land on curve as often as possible to play Laelia, the Blade Reforged or Chandra, Dressed to Kill on turn 3. We also have a lot of utility in our lands, and a lot of ways to filter through our draws with cards like A-Dragon's Rage Channeler in order to mitigate flood.
In terms of the lands themselves, I’m running 4 Den of the Bugbear which I’m a huge fan of since it often provides us with the last bit of reach we need to close a game out and gives us something good to do with our mana if we do flood out.
4 Ramunap Ruins is similarly great, giving us another bit of reach to kill the opponent which is very difficult to interact with. Sokenzan, Crucible of Defiance is also free to run as a single copy and the channel does occasionally come up (you’ll get a discount on it if you have Laelia, the Blade Reforged in play) and the rest is basic mountains to fill out the manabase.
3 Strangle & 4 Molten Impact: It’s really important to only run burn spells that can hit any target in the main deck, but we can afford to run burn spells like these in the sideboard in order to deal with creature heavy decks in games 2 and 3. These are much more efficiently costed and really help at being able to cleanly deal with bigger creatures.
Molten Impact is great since it can immediately take out 4 toughness creatures, and it can also take out multiple smaller creatures with the excess damage which synergizes really nicely with our other burn spells.
We don’t normally mind using multiple burn spells in order to kill bigger creatures since we have a lot of ways to refuel, but it’s always awkward having to use multiple burn spells in order to kill a 3 toughness creature, especially Ledger Shredder as it will give them a free connive, so Strangle is great to bring in as a very efficient way to deal with slightly bigger creatures.
1 Unlicensed Hearse & 2 Soul-Guide Lantern: This is here as graveyard hate for matchups like Izzet Phoenix and Esper Greasefang. These are both decks that can swarm the battlefield faster than we’re able to deal with with our removal, so they’re very important at shutting off the most problematic parts of those decks.
I like the 1/2 split here – the first copy of Unlicensed Hearse is the best graveyard hate available but it is a card that has diminishing returns on any additional copies you draw whereas you can cycle away Soul-Guide Lantern if you draw multiples, and it also provides a sacrifice trigger too.
2 Roiling Vortex: This is mainly here for the control matchup but it’s also nice to have against more fringe lifegain decks like Angels and Helioak combo too (if those two decks become more popular then you might also want to find room in the sideboard for Rampaging Ferocidon but those two matchups aren’t that popular right now from my experience).
This is really strong against control if you can get it down early – most of the games against control will go pretty long so this can often end up dealing close to 10 damage if they don’t find an answer to it which is insane for 2 mana! It’s also useful to be able to shut off lifegain from cards like The Wandering Emperor and Baneslayer Angel or Dream Trawler if they bring them in.
1 Shatterstorm: I found the affinity matchup quite difficult since they can often make big creatures with Nettlecyst or Karn, Scion of Urza that are very difficult for us to get past, and if they can equip one of them with Shadowspear it’s usually game over.
Because of that, I wanted something that will really improve the matchup and Shatterstorm is usually a complete blowout if it resolves. If you wanted to find room for more cards to improve the affinity matchup, then I’d probably run 2 By Force (instead of Shatterstorm and one other card) as that’s generally a card that’s better in multiples, but I think Shatterstorm is better as a 1-of.
Best of 1:
The only downside of playing this deck in best of 1 is the presence of all-in combo decks like Dragonstorm, Reanimator and Greasefang, which are all quite difficult matchups for burn without hate pieces like Roiling Vortex or Unlicensed Hearse. You could potentially run some of those in the maindeck but that will make your deck less consistent against everything else and so I would just run the maindeck as it is, and try and be as aggressive as possible as soon as you realise you’re against one of those combo decks.
Graveyard hate is very important in this matchup at shutting off Arclight Phoenix (which is their most problematic threat since it’s recursive) as well as delirium, which is very important to shut off as it will protect Laelia, the Blade Reforged once it’s attacked and makes it a lot harder for them to kill Soul-Scar Mage.
Strangle and Molten Impact are very important as they can quickly and efficiently kill threats like Symmetry Sage and Ledger Shredder before they start getting in for damage. In general, killing their creatures is the priority here but you should start applying pressure as soon as the coast is clear since Phoenix decks don’t have any life gain so will have to go on the defensive once their life total is low which plays perfectly into our game plan.
Unholy Heat is the main card to be wary of in this matchup and you should try and play around it wherever possible, especially with Soul-Scar Mage where you should always hold up instant-speed burn if possible, or set stops during the opponent’s turn to make them think you have it.
This matchup is all about applying pressure and you can do so from multiple different angles like creatures, Chandra, Dressed to Kill, Roiling Vortex, your lands, burn spells etc. so it’s always good to attack them on different fronts if possible.
The main three cards you should be considering in this matchup are board sweepers like Divine Purge or Supreme Verdict, The Wandering Emperor, and Teferi, Hero of Dominaria. You can typically commit to the board quite fast, but you always need to have a plan/something else in hand to follow up with if they have a sweeper – this is generally why it’s a good idea to diversify your threats in the early game if you can eg. get a creature into play, then something like a Roiling Vortex or Chandra, Dressed to Kill.
You should also always be wary of Teferi, Hero of Dominaria and have a plan to kill it going into their turn 5 whether that’s creatures, burn spells, or a combination of the two, as they’ll generally run away with the game if you let it survive and untap.
Ramunap Ruins and Den of the Bugbear are also both really important in this matchup as they both represent additional damage and Den of the Bugbear is also great at killing planeswalkers if they tap out – for this reason it’s really important not to fire up Den of the Bugbear into open mana unless you really need to, since losing it to something like March of Otherworldly Light in the early game can mean you miss out on killing a planeswalker or potentially dealing lethal later in the game.
This matchup will usually be decided in the first few turns of the game – if you can run them out of creatures with your burn spells, then their deck basically does nothing, but if they can get a creature to stick and get auras on it, you basically have no way to kill it and will usually lose.
For this reason, it’s crucial to play incredibly cautiously in the first few turns to ensure they don’t get a creature to survive – hold up instant-speed burn spells at every possible occasion you can and try and play around their protective spells like Slip Out the Back, Karametra's Blessing, and Spell Pierce.
Once you’ve stabilized, you should still be careful and hold up instant-speed burn wherever possible as they can always top deck a creature and then immediately start suiting it up with auras which can get them straight back into the game, especially if they have a lifelink aura.
Soul-Scar Mage is very important in this matchup since it can give us a way to kill a slightly bigger creature over the course of a couple of turns, and it enables us to kill their creatures even if they’re given indestructible by Selfless Savior.
How you sideboard in this matchup will depend on the exact build your opponent is playing so always pay attention to what they’re running game 1. This is how I would side if the opponent is on a more standard Rakdos Midrange list without much graveyard synergy, but if they’re running something like Dreadhorde Arcanist or Kroxa, Titan of Death's Hunger, then you should also bring in Soul-Guide Lantern and Unlicensed Hearse.
In general, this is a grindy matchup and their creatures usually provide good value so should be the primary target for your burn spell. You’ll win most often by clearing the board of their creatures and then forcing through damage once the coast is clear. You should also always have a plan for Chandra, Torch of Defiance as that is a card that that will tend to snowball the game in their favour if you don’t have a way to kill it quickly.
They will usually board into more creature removal against you which often means they’re slower and a bit less aggressive, which you can take advantage of with Chandra, Dressed to Kill.
This is one of the tougher matchups since they can get very big creatures into play off Nettlecyst and Karn, Scion of Urza which are hard to get past, and if they equip one of those with Shadowspear it’s usually impossible to beat.
Shatterstorm is an absolute blowout in this matchup if it resolves, but do be wary of Metallic Rebuke when you’re casting it – if they’re consistently holding open blue mana then try and bait it out on something else first because getting Shatterstorm countered is really bad.
If you wanted to improve this matchup even more, then you could potentially replace 1 Strangle and 1 Shatterstorm with 2 By Force to have multiple pseudo-sweepers against them that you can also cast earlier in the game (this does make your sideboard more narrow though so I’d only do this if you expect to face a lot of affinity).
You want to ensure that you kill Esper Sentinel and Ingenious Smith as quickly as possible to avoid giving them cards, or Ingenious Smith growing too big, and then just apply pressure as quickly as possible. You’ll usually lose if the game goes long since it’s hard to beat Shadowspear, Nettlecyst, or Karn, Scion of Urza, so you want to give them as little opportunity to find those cards as possible.
This matchup is a pure race – since we’re not running Bonecrusher Giant, we have no way of beating the Nine Lives + Solemnity lock once it’s set up so we have to kill them before they manage to set it up.
Make sure you kill Sythis, Harvest's Hand and Sanctum Weaver immediately to slow them down. If they play a turn 2 Sterling Grove to protect their main creatures then just go as aggressive as possible, attack them with everything and start pointing burn spells to their face as quickly as you can.
If they do manage to resolve Sythis, Harvest's Hand and they have it protected with Sterling Grove when you have a Roiling Vortex in play, then always make sure you hold open red mana going into their turn to shut off the life gain.
This might seem like a bad matchup on paper because they’re built around lifegain, but I’ve actually found this to be a decent matchup as long as you’re careful with your burn spells. If you keep their life gain enablers off the board then they can’t combo off or grow their Voice of the Blessed or Trelasarra, Moon Dancer so kill Soul Warden and Lunarch Veteran on sight if you can.
Having said that, it’s also usually a good idea to kill Voice of the Blessed and Trelasarra, Moon Dancer if they’re within range of your burn spell because they could be holding onto more life gain enablers and those creatures are very difficult to take out if they get out of range of your burn spells.
Some builds run Ajani's Welcome which we have no way of interacting with, so if they have that in play, always hold up instant speed burn if you can in order to kill Scurry Oak or one of their other life gain payoffs with the trigger on the stack, before they start getting +1/+1 counters.
Roiling Vortex is really strong in this matchup once you can start activating it every turn, but it can be risky going straight for it early in the game. This is especially true on the draw since it’ll give the opponent a turn to grow their creatures and they could start applying pressure which will be compounded by the extra damage you take from Roiling Vortex, so it’s typically better to wait until you’ve stabilized a bit.
Molten Impact is also great in this matchup since you can use it to kill something like Soul Warden, and then use the excess damage to kill a bigger creature, or multiple creatures, which is a great way to stop them going off with Collected Company.
This matchup is all about killing their creatures as quickly as possible in order to limit the amount of damage you take and to keep them off Embercleave. Post-sideboard you have access to a lot of removal so you’re basically playing the control role here, don’t worry about applying pressure back until you’ve stabilized.
You typically have the better late game since you have a lot of ways to refuel and a lot of interaction for any later creatures they draw, so make sure you’re playing defensively until you’ve stabilized. If you stabilize at a low life total, it’s always a good idea to hold onto burn spells for any creatures they draw off the top, but if you stabilize at a higher life total then it’s often better to apply more pressure and give them fewer draw steps to get back into the game.
This matchup is quite similar to Embercleave Aggro in that you’re usually playing the control role, and basically want to kill their creatures as quickly as possible in order to limit the amount of stats they get off cards like Thalia's Lieutenant and Adeline, Resplendent Cathar. Even though they tend to go wide quite fast, you have a really high density of cheap burn spells so you should be able to keep up.
Starts with Esper Sentinel and Thalia, Guardian of Thraben can be awkward, especially going second, so having access to 1 mana burn spells is very important in this matchup. Molten Impact is also great here so make sure you plan out your sequencing on your burn spells in order to pick off multiple creatures with the excess damage.
Even though you’re usually playing the control role, it is possible to start getting aggressive if they have a slow start (especially with Laelia, the Blade Reforged), and since they don’t usually have ways to gain life, you can often outrace their slower starts, especially going first so play it by ear. Having said that, for Humans to keep a slow hand, they often do it on the back of their powerful top end cards like Collected Company and Inquisitor Captain, so always bear those in mind if you decide to go on the aggressive early on.
If you have open mana, it’s very beneficial to set stops during the opponent’s turn to not give away that you don’t have anything, especially if you have Soul-Scar Mage in play. Since Arena automatically passes priority when you don’t have anything you can play, it’ll be very obvious to the opponent that you don’t have any instants, which will enable them to freely attack into Soul-Scar Mage since they know you won’t be able to pump it. If you set stops, it won’t give any information away and will likely mean it’s too risky for them to attack in those situations since they could very easily get blown out in combat if you had a burn spell.
The -1/-1 counter ability on Soul-Scar Mage allows you to kill indestructible creatures so if the opponent has an effect like Selfless Savior, Dauntless Bodyguard, or Seasoned Hallowblade, the -1/-1 counters will kill the still kill the creature even if it has indestructible.
Additionally, the -1/-1 counter ability on Soul-Scar Mage also prevents Molten Impact from dealing any excess damage so be aware of that when you’re planning your turns.
If you set a stop during your upkeep with A-Dragon's Rage Channeler in play, you can use a burn spell before your draw step in order to surveil before you draw – this is especially useful if you’re trying to dig for a land in the first few turns.
Burn is one of my favourite archetypes to play and there have been a ton of sweet new tools for burn added to Historic over the past few months. It’s been so annoying not being able to play them because of the constant presence of Cat/Oven decks, but now they’re gone, the archetype finally feels viable again and it’s been so much fun to play. Thanks a lot for reading!
Premium
Enjoy our content? Wish to support our work? Join our Premium community, get access to exclusive content, remove all advertisements, and more!
No ads: Browse the entire website ad-free, both display and video.
Exclusive Content: Instant access to all exclusive articles only for Premium members, at your fingertips.
Support: All your contributions get directly reinvested into the website to increase your viewing experience!
Discord: Join our Discord server, claim your Premium role and gain access to exclusive channels where you can learn in real time!
Special offer: For a limited time, use coupon code L95WR9JOWV to get 50% off the Annual plan!
Alth is an MTG Arena grinder who has been #1 on the ladder multiple times and is always looking to bring new ideas and archetypes to the format and push them to the top spots on the ladder. You can follow him on Twitter and YouTube.