It’s taken a little bit, but I’m finally sitting down to write everything I know about the deck I piloted to 2nd place at the Arena Championship. This deck is very powerful, and I believe deserves a spot in the top tiers of the pioneer metagame… if only people understood it better. I hope that with this guide, I can push the public understanding further and get some Quint pilots out to Washington DC this RCQ season.
Why should I play this deck?
First, I want to make the “pitch” for investing your time and card acquisition into Quintorius Combo. While I have only played the deck in Explorer, I think it’s almost a perfect port into Pioneer, and still quite well positioned. You should play Quint if…
You are less experienced in pioneer and want to win a lot while learning a unique deck and learning about the rest of the format at the same time
You want a good matchup against Rakdos Vampires, Waste Not, UW control, Niv to Light, and a decent-to-good matchup against Phoenix
You are okay with bad (but still definitely winnable) matchups against Amalia, Heroic, Spirits, and the wide variety of low-to-the-ground aggro decks
You are comfortable learning a complicated manabase and memorizing land sequencing patterns
You are comfortable making high-risk, high-reward decisions
You can trust your deck to provide more action as the game goes on
You can learn from games you win but made poor decisions, and games where you lose despite making all the right decisions
You enjoy diving deep on a deck that many dismiss as “low-skill” and a “one-card combo”
You like ramp decks with big fatties
You like combo decks and doing (or referencing) probability math based on the contents of your deck
Again, I cannot stress this enough: You want to win a lot of games of Pioneer/Explorer.
The List
Here’s an Arena-uploadable version of what would be my current list for taking to an RCQ. It’s exactly my 75 from the AC, except making the direct swap of 2X Spinewoods Armadillo from OTJ in for 2X Herd Migration.
Let’s talk a bit about the combo at the core of the deck. Some of this might be basic for folks who are more familiar with the combos/engines, so feel free to skip to the next section.
This deck’s core gameplan is to get a Quintorius Kand into play, activate Quintorius’s -3 ability, and discover into a Spark Double.
Casting Spark Double drains your opponent for 2 life with Quint’s passive ability
That Spark Double makes a nonlegendary Quintorius, which can again activate the discover ability and find another clone.
Once you have at least one nonlegendary Quint, you can copy that Quint with Clever Impersonators, effectively giving you Spark Doubles 5-6 (if you find an Impersonator first, you just copy Quint, lose the original Quint, and keep going until you find a Spark Double).
This process will drain your opponent for a very large amount of life before you run out of clones, and probably win you the game. Even if it doesn’t, you’ll still end up with 4+ Quints in play, the last of which can make a 3/2 body for ground protection.
The uncertainty in these scenarios comes from how many Clever Impersonators you hit off of discovers before you run into a Spark Double. You’ll notice though, that the vast majority of these scenarios do 20 or more damage. It’s not a guaranteed kill every time, but it’s good enough almost every time. This is our first encounter with the uncertainty of this deck. Prepare yourself — you’ll need to get used to it.
Why does it say “casting Quint only”? Isn’t that our only way to get the combo started?
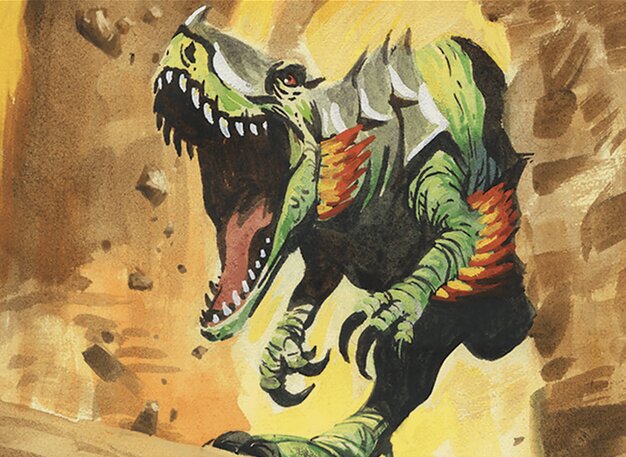
Trumpeting Carnosaur allows us to discover 5, which can hit either Quint or a clone. If we hit a Quint, we’re off to the races with our normal combo. If we hit a clone, well… gee, that’s a nice lookin’ dino we’ve got sitting in play! Copy the dino, rinse, repeat until you hit a Quint.
This approach runs the risk of depleting our clone supply before we hit enough Quints to drain the opponent for lethal, but it has the nice upside of leaving behind a board of 7/6 trampling fatties to finish out the game the next turn. It’s also worth noting that with a Dino in play, even when you run out of clones, your last clone can copy a Dino, discover into another Quint, and get an extra round of triggers.
This is where many lists stop in terms of ways to combo off. But not us. We’re going deeper. Into the depths, you might say.
Gyruda, Doom of Depths is the last, and usually the weakest, way to kickstart our combo. Gyruda mills 4 cards from each player, and normally we’re looking at our own library to provide for us here. If we hit a Clever Impersonator, we get to re-roll (but we lose our original Gyruda). If we hit a Spark Double, we also get a re-roll, plus a 7/7 body in play. If we hit a Carnosaur, we’re off to the races. (We can also hit Greater Tanuki, Spinewoods Armadillo, or Shefet Monitor, which don’t let us combo, but still amount to some significant board presence).
The math on the Carnosaur and Gyruda versions of the combo is significantly harder to calculate than the Quint-only version, but trust me when I say it’s good enough. Resolving either of these cards in most scenarios gives you at least a decent, and usually a very good, chance of winning the game.
Keep the faith.
What do the rest of our spells do?
Mainly, they keep us alive while meeting the deckbuilding requirements for our combo.
Every other non-combo spell in the maindeck has a mana value of 6 or greater, and some type of ability that reduces or removes that cost so that we can impact the game in the early turns.
For interaction, we have Leyline Binding, which usually costs 1-2 mana due to our tri-land heavy manabase (we also have the “channel” ability from Trumpeting Carnosaur and the ability to hard-cast a Clever Impersonator in a pinch).
Lastly, we easily blow through the companion restriction for Keruga the Macrosage (3 or greater?! Try 6 or greater – get in here, girl!). Keruga is a great way to always ensure we have some amount of “gas” in this deck, since we can draw her every game.
I haven’t touched on the lands yet, but that’s because this manabase deserves its own section. Let’s get into it.
Mana Sequencing, and the Importance of Minor Details
The manabase of this deck is a work of art. I don’t know who created it, but they must have had a lot of experience with tri-land manabases, and as far as I can tell, it’s nearly optimal. We tried to improve the mana leading up to the AC, but quickly realized we were in over our heads. Unless you’re Frank Karsten or have multiple afternoons on hand, I’d recommend not tinkering much (the one exception being that if you want to add additional lands, I think that’s probably fine. We added land #28 to the list when most ran 27, and I feel very confident that was correct. 29 might be even better).
Here is, in rough priority order, what the manabase of this deck is trying to accomplish (and therefore, what you should care about when sequencing your mana development):
Single Green for playing your ramp spells
Single White, + multiple other basic land types for playing Leyline Binding
Single Red, for casting Quint (assuming you already have the white) and channeling Carnosaur
Double-white for casting Quint + holding up binding (or double binding)
This is a GREEDY manabase. Notice how eventually you want double sources of everything, and how disjointed some of the priorities are. Single Green is your top priority, but Double Green is almost at the bottom. For all your combo pieces to be castable, you need at least R R W (U/B) (U/B)… but remember, our top priority is getting green first! Also, don’t forget your leyline counts! Are we playing against a deck with counterspells? What should I name with Cavern of Souls?
If you REALLY wanted to simplify it down, you could summarize with two sentences:
First, you want 1 of every color (G->W->R->U/B)
Then, you want 2 of every color (R->U->G->B->W)
The main point I want to make is that learning how to develop your mana is probably the most important skill with this deck. There will be some games, maybe even most games, where you have everything you need without much fuss and don’t really have to think about it. But there will be other games where making the wrong choice will be the difference between winning and losing (more on this later).
If you start to pick up this deck and run into a spot with difficult mana decisions, the most important thing is to STOP AND THINK (you can worry about topping that twink later). The worst thing to do is rush through your basic searching, tapland sequencing, or Cavern naming. These are fundamental parts of playing this deck correctly!!!
Let’s get into some scenarios.
Starting simple – Here, the opponent is passing the turn and we’re channeling our Tanuki. GGUUBB is already taken care of, so we only need to worry about Red and White. Which do we fetch? The answer is white:
Maximizes our chance to play Quint next turn (2X Stomping Ground, no other untapped white nonred sources we could draw)
Here’s another one:
We’ve got single pips of all sources covered thanks to our shock-triome pairing. Double green is covered, so what do we want next?
The answer is double red. This is a higher priority than double blue, because it unlocks both Quint and Carnosaur.
Another:
We’ve already got GGRRUWB — What’s missing from the priority list? Double Blue.
This one is obvious when you know the deck’s requirements, but without Clever Impersonator in hand, you need to always be aware of your ability to draw it – and be able to prioritize that against all your other goals with the manabase. In this case, we can afford to hedge in case we draw an impersonator, so we should.
Another:
Getting slightly more complicated now. We have GGWRB taken care of, as well as U towards Impersonator (but not towards Leyline or Gyruda). Also worth noting that we don’t have Quint mana, despite having WR, because they are on the same land. We also have WB for our post-board Consume.
The correct answer here relies on the fact that we have the second Tanuki in hand. Normally, our top priority would be R, since this unlocks both Quint and Carnosaur – However, neither of those are castable on 4 mana next turn, but a topdecked Impersonator would be (and is quite good given the Fable on the stack). Moreover, we have the second Tanuki to find R, and since the opponent is tapped out, it’s not going to get Thoughtseized before we can use it. We should find U here, then R on the following turn (unless we draw an impersonator, in which case we should copy the saga).
What can land sequencing cost you in this deck?
If you want to get REALLY deep into it, I recommend watching game 1 of my match against Arne in the AC, starting at about 4 minutes here:
Turn 2 is where I make a mistake that ends up maybe costing me the game. I don’t have any untapped lands besides Cavern of Souls here, and I want to cycle my Herd Migration this turn, so I’m forced to play a Cavern. What should I name?
There are essentially 3 considerations here, given that I’m not playing against a counterspell deck, so I only care about the mana. They are Dinosaur, Shapeshifter, and Kraken (or Demon, either one, basically “Gyruda”).
In hand, I have another Cavern and a Ketria Triome. The triome gives me theoretical access to UU for Impersonator and Gyruda, and the other cavern should account for anything we miss with this one. Despite being somewhat awkward, our mana for threats is looking good.
Now there is a secondary mana development problem to solve — I don’t have access to W yet for the leyline binding in hand (or a topdecked Quint). My plan is to grab this with the Beanstalk Giantuntapped, so that I can both ramp and leave up interaction in a single turn. That means I need to leave the one-of plains in my deck for the Giant, and so I’m fetching a different land with Herd Migration this turn.
What should I fetch with Herd? Well, I want to be able to play Binding for a single white mana on turn 3, which means I need to have all basic land types accounted for. I’m fetching up the plains with the Giant, so I need to fetch Mountain with the Herd.
Alright, so we know our sequencing on the basic fetchers. Back to the cavern. We’re going to be fetching RW, so RR for Carnosaur is also accounted for with the Ketria Triome. The only factor here is timing.
I believe the correct name here with the first cavern is Shapeshifter — The reasoning is that Impersonator, costing 4, is the card I’m going to need to cast first, and this choice lets me save my future cavern in case I need an untapped source for either Gyruda or Carnosaur.
Unfortunately, I didn’t take the time to think through all of this on turn 2 of a high stakes match. I ended up going with our “default” naming with cavern, which is Dinosaur (since it covers Keruga and Carno).
2 turns later, I needed to name Shapeshifter to get my Clever Impersonator down, and 3 turns later, I’m stuck with a tapped Ketria Triome on the turn I want to cast Gyruda.
That turn 2 decision, which most people would skip over, and I basically did too, lead to a game loss, in one of the highest stakes matches I’ve played in my life.
This is the importance of thinking carefully about your mana development with Quint.
The Fun Stuff (Gameplay Philosophy)
Alright, enough with the scare stories. I put the mana section upfront because it’s an absolute requirement to take it seriously if you want to win with this deck — But there’s a lot more fun Magic theory behind piloting Quint than just which basics to fetch.
Note: If you really want to go deep on Quint gameplay, I highly recommend the series of videos GlosuU & I did breaking down all 6 of his AC matches (see the resources section above). There’s only so much I can communicate in writing here, but there are FIVE hours of video with us breaking down the minutiae of gameplay that I think are highly worth the watch if you’re serious about piloting this!
Here is, in one sentence, what I want to impart to people who are trying to play Quint at a high level:
HAVE FAITH YOU WILL DRAW MORE THREATS!!!!!!!!!!!
This is the core deckbuilding principle behind playing 4X Gyruda, and the main bonus you get for playing lots of 6+ cost spells beyond the obvious need to enable your combo. A lot of people see Quint as a “Splinter twin”-style combo deck, where instead of needing to combine two cards for an instant win, you only need to play one, at the cost of a severe deckbuilding restriction.
This is of course somewhat true, but I think a better way to describe Quint is as a ramp deck where your threats happen to be game-winning a high percentage of the time. This shifts the thinking from “gotta figure out how to sneak through my combo piece”, to “gotta get to my lategame and jam my (abundant) threats until one sticks”.
Lots of Pioneer decks are well-stocked with answers. No More Lies, Bitter Triumph, Spell Pierce, Leyline Binding, you name it: your opponents (for the most part) will be prepared to interact with your combo at least once, sometimes multiple times. The big downside to playing so many expensive cards is that other decks are faster and more efficient than you. Opponents are routinely going to be able to trade for your spells in a mana-positive way. Not only do your opponents get to spend more mana than you in the early turns, they also get to answer your 6-drops with their 2-drops.
Because your opponents are spending more mana than you in the early turns, you will be under pressure a lot. Bloodtithe Harvesters, Ledger Shredders, Amalias, Monastery Swiftspears — All of them are free to get into the red zone until at least turn 5.
The situation sounds dire, and indeed it sometimes can be – You will lose games with this deck because the opponent was faster than you and there was simply nothing you could do about it. But remember, all we have to do is survive! Not only do we have a 1-card combo, our deck is chock full of ways to spend our mana lategame.
The player who spends the most mana generally wins the game.
Remember this when you’re playing Quint, and remember that opportunities to use your mana are few and far between – especially in the early turns. You must have a VERY good reason to pass up an opportunity to spend mana with this deck.
Here are a few heuristics based on this philosophy:
Always play your leyline on the first relevant threat at the first opportunity
Use your carnosaurs if it will significantly reduce the opponent’s clock, even if you don’t have additional threats in hand
Prioritize buying Keruga before you have enough mana to deploy threats (Keruga is a huge reason this deck almost never runs out of gas, but she is quite clunky to buy later on in the game, so if you can, grab her early).
Try to get your taplands out as early as possible (these are opportunities to “spend” 1 mana on an early turn without potentially losing out on the opportunity to spend 5 or 6 on a future turn)
If you’re under a significant amount of pressure (anything less than a 4-turn clock), PLAY A THREAT OVER DOING NOTHING… even if you think it’s extremely likely your threat will get answered… sometimes even if it’s your only threat.
Use your Clever Impersonators at the first relevant opportunity if you can’t play a threat — Even trading with your opponent’s card at a significant tempo/value disadvantage will prolong the game and give you more time to spend your mana. More importantly, the clones in your hand are likely not doing anything else!
Play your only combo piece into open mana if you can’t think of a specific answer the opponent could have. If you can, try to determine the actual likelihood they have it before deciding to wait. If you’re under a lot of pressure, you may have to cast it even if the opponent is extremely likely to have an answer.
Keep hands without threats!!!! (We’ll get into this more in the mulliganing section).
These are, of course, heuristics, not hard and fast rules — but generally I think they represent an important shift in how most players think about the deck, and internalizing this shift as much as possible is crucial to succeeding with it.
With that in mind, let’s look at some more specific decision types and scenarios that come up.
Spending your mana
Here we’ve just begun our turn in a pre-sideboard game against UR Phoenix. Our opponent has already cast 2 Picklock Pranksters, so we know 2 of the cards in their hand – One being a Spell Pierce. Our hand is a little unusual — We have 3x Quintorius and no other spells (though we do have the option to buy Keruga).
Here, the play is obvious — We shock ourselves with an overgrown tomb, cast a Quint into the spell pierce and get “blown out”! No, really. That’s actually the play. I’m serious. Here we need to spend 5 mana and allow our opponent to answer it with their 1 mana.
The reason the play is obvious is when you consider what happens on the following turn. Phoenix normally plays 2 Spell Pierce in their deck. After they’ve used this one, there’s only 1 left, and it’s extremely unlikely they have it. We get to jam a second Quint and likely win on the spot!
Okay, what if they have the second pierce? Now we’re down to only one Quint. A bit scary, right? Until we remember what’s left in their deck: 0 spell pierces. Some Phoenix lists run 1X Prismari Command and some run 1X Torch the Tower but that’s it. We’re forcing the opponent to have multiple running answers over consecutive turns, when they have a (realistic) maximum of 4 total in their entire pre-board deck. We are extremely likely to win the game by playing “stupid” here and just jamming Quint after Quint after Quint.
Let’s even say the opponent DOES have it all. Where are we left? Well, since the opponent had multiple additional answers, we can discount the rest of their hand a little bit. Maybe they have a treasure cruise to refuel, and maybe that cruise draws them into the perfect set of action like a Ledger shredder into a Phoenix into multiple cantrips to get the Phoenix back. It’s extremely unlikely, but possible.
In this worst case scenario, we’ve still gotten multiple additional turns to draw any of our 4 Carnosaurs, 4 Gyrudas, or 1 additional Quint and force the opponent to have answer #4.
They don’t have answer #4… they very likely didn’t even have answers #2 or #3!
So yeah… get blown out by their answer. Spend your mana. And then, continue spending your mana and win the game.
Choosing your threats
Here’s another game against Phoenix, this time a version with Proft's Eidetic Memory. We’re post-board here, which is highly relevant, because Phoenix brings in many answers to our threats, including:
Luckily we’re not under much pressure, and we have caverns on both Dinosaur and Kraken, so we don’t have to worry about our creature getting countered. Which threat do we play?
Since we’re not under much pressure, we don’t care about winning the game this turn
We’ll be able to deploy whatever we don’t play this turn on the following turn
The opponent passed with mana up, so they likely have at least one answer, if not multiple.
Post-board, the opponent brings out their burn spells and can’t deal with a 6-toughness creature.
Both Gyruda and Carnosaur can get bounced by a Brazen Borrower – If either hit a clone, that will mean we “fizzle” for the turn. Gyruda is slightly more likely to hit something that isn’t a clone but we can still get back, like a Tanuki or a Ledger Shredder or another Carnosaur. It’s also worth noting that whatever Carnosaur discovers into can get countered by a Spell Pierce or a Mystical Dispute, whereas Gyruda bypasses the stack. Carnosaur can also get Aether Gusted even with the Cavern.
This decision isn’t as simple as “which threat will stick?”, since Gyruda is less likely to find us our combo. However, the key thing to recognize here is that we’re not under much pressure, and getting a 6/6 creature onto the board (plus potentially more bodies) is a significant step towards winning us this game. This isn’t always the case against Phoenix — Sometimes you’re under a lot of pressure in the air, and ground bodies do next to nothing. But starting from an empty board, it’s really hard for them to race a large creature.
This is a post-sideboard game where you’re under a lot of pressure, but also have a hand with some threats and caverns to hopefully force them through. We’re currently in the opponent’s combat step and being attacked for 6. What to do?
Well, immediately we only have two possible ways to spend our mana: Cycling the tri-land to “tri” and find another threat (sorry), or using Carnosaur to kill the Brazen Borrower. Using Carnosaur signficantly lowers their clock, but it’s scary, since it leaves us with only 1 threat, and our worst one that that in terms of combo potential, Gyruda.
Still, I think the play here is clear. The first rule is don’t die!! We’ve got to use Carno here to avoid a 3-turn clock. Not only is it likely our opponent can answer Carnosaur in some way if it’s the first threat we cast (see above), even if Gyruda ends up whiffing we’re going to be a much better position if we save ourselves from being under lots of pressure than if we save a “backup” threat. Remember the golden rules: 1) Have faith that you will draw more threats and 2) The player who spends the most mana usually wins the game.
A note on Tri-lands and cycling: Here, I’m not really counting cycling the tri-land as “spending mana”, even though that’s technically what you’re doing. What I really mean by spending mana is spending mana to impact the board or at least force your opponent to have answers. I am, in general, VERY hesitant to cycle tri-lands in this deck unless it’s an absolutely obvious spot to do so. If there’s another way to spend your mana, and there usually is, default to that. This deck is threat-dense and mana-hungry, both in terms of colors and raw amount. Tri-lands are lands first, second, third, and fourth, and cycling cards fifth.
GlosuU killed the Borrower here, and slammed a Gyruda the next turn, which milled into a Clever Impersonator for a re-roll, then a Spark Double and a Phoenix from his opponent’s yard. The next turn he copied Gyruda with the spark double from hand, finding a Carnosaur and going off.
Keep the faith. You’ll have the gas.
Sideboarding Guide
I’m almost 5,000 words into this guide and I haven’t even given you a sideboarding guide. What a terrible MTG content creator I am! Let’s remedy that.
Luckily, sideboarding with Quint is pretty easy. Because your combo is so restrictive on your deckbuilding requirements, there isn’t a lot of wiggle room when it comes to sideboard choices or taking cards out. This means that our sideboard slots have to be mostly high-impact choices targeted at individual matchups.
Here’s the sideboard guide our team used for the Arena Championship (Thanks Ethan for putting it together!). This was an Explorer tournament, so it doesn’t factor in decks like Lotus Field or Niv to Light, but it still covers most of the Pioneer meta:
This is the classic “narrow but high impact” sideboard card. We run 4 of these, and it’s almost exclusively to fight against UW and UB control decks. UW only has a few ways to answer it (Narset’s Reversal, Summary Dismissal), and UB has a few more (Thoughtseize, Deadly Cover-Up), but resolving a distortion and following it up with a threat the next turn is a gamebreaking sequence. These 4 slots turn a 40% matchup into a 65% matchup, and as such, they justify their place.
If your local meta is low on control, I could definitely see moving down to 3 or even 2 Distortions in favor of more answers to something pioneer-specific like Lotus Field. However, make sure whatever you’re adding is as high-impact as Distortion, which is a hard feat to accomplish.
Quakebringer is part of our plan against Amalia — The only matchup where we sideboard more than 4 cards and the only time we remove the deterministic quality of our Carnosaur combos (since Carnosaur can immediately discover into a Quakebringer and then you’re done).
Some Amalia lists have ways to deal with Quake, like Get Lost, Giant Killer, or Ravenous Chupacabra, but many don’t or have very few. Quake sitting in play turns off their ability to combo completely, and once you start cloning them with your Spark Doubles, it becomes very hard to lose the the game in combat either.
Remember you can foretell it on turn 2!
Sometimes I’ll bring in 1-2 Quakebringers against UB control to diversify my threats against Deadly Cover-Up.
This is the last sideboard card we found in testing, and it’s the only one that’s somewhat versatile.
The main use of this card is definitely the Consume side, which is quite handy against Vein Rippers and Archfiend of the Dross, and matchup-saving against RW Heroic (though maybe less so now with Slickshot Show-Off).
Consecrate can also be used to nab Phoenixes out of the yard or deal with a large Crackling Drake, but be careful bringing too many of these in, because they can be very clunky. Often the Phoenix player will discard and return their Phoenixes in a single turn, and this deck is not very good at leaving up 2 mana in the midgame. They often don’t board in any Drakes, either.
I think this sideboard is pretty strong against a wide field and contains the highest-impact cards for the deck’s worst matchups, but here are some other cards we considered during testing (keep in mind that anything must have CMC 5+, and usually 6+, unless it’s a game-breaking threat+answer like Quakebringer):
Okay, so we understand what the options to bring in are. There’s still a whole other half to sideboarding! What are we bringing out?
The most important advice I can give here is that less is more. It’s very hard to go wrong under-sideboarding with this deck. 18/32 of the maindeck spells I consider untouchable:
Beyond the true untouchables, you only want to board out Leyline Bindings and Gyrudas in very specific matchups. Leyline is your best piece of interaction bar none, so you only take it out against control (and even then it’s debatable because it can answer planeswalkers and make your Kerugas more threatening). Gyruda is your worst threat but you still want 12 of them in most matchups. You only take it out when racing, not threat density is the most important factor, which also happens to be the matchups where you need to maximize interaction so you’re bringing in more than 4 cards (Amalia & Heroic).
That leaves us with only a couple “flex slots” that are up for cutting every time we go into our sideboard:
These are essentially all of our “worst” rampers. Beanstalk is worse than Tanuki due to being sorcery speed and counterable, as well as being slightly less castable as a creature (the fact that you can get both the creature and the land is rarely relevant).
Most of the time, you’ll be shaving Armadillos and your Shefet Monitor, plus maybe 1 Beanstalk to bring in 3-4 high-impact cards. Don’t overdo it!!!!
Mulliganing
Finally, let’s get into what is likely the most crucial decision you’ll make every game with Quint: Your opening hand. We liked to joke during testing that you only get 5 meaningful decisions every game with Quint, and your opening hand is the only one that’s guaranteed to matter every game. So let’s make it well!
The one-sentence version of my opening hand advice is this:
Keep every hand that can realistically get you to a place where you have 5-6 mana in play and are not dead.
Is it really that simple? Well, kinda. We’re going to dive in deeper, but I think this is really the major takeaway. This deck will give you some awkward, clunky, and stressful hands. The key to unlocking its potential is to keep the faith and trust your deck to deliver.
What do I mean by this? Well, if you’ll notice, I didn’t say anything at all about having a threat or a combo piece in your opener. This was intentional. Of course, having threats matters, but that’s why we play 12. You absolutely must have faith!!!!
Of course, the presence of a threat does make an opening hand stronger. Here’s the slightly longer version of my opening hand philosophy:
You want A+B+C where A is functional mana, B is ramp OR disruption (only need 1), and C is a threat (only need 1), in that order. You keep every hand with all 3, most hands with A+B, some of the best hands with A+C (perfect mana + Quint is usually a keep, matchup dependent and being on the play helps) and mulligan everything else.
The key insight here is realizing that interaction and ramp are essentially the same thing in this deck. Both are trying to get us to that gamestate where we have 5-6 mana in play and aren’t dead. One does it by slowing down the opponent’s clock, the other by skipping ahead a turn in mana development. But in terms of an opener, both are roughly equivalent.
I really mean it when I say that threats are third in the pecking order when it comes to importance in an opening hand. This deck is designed to draw game-winning threats!! The hard part is all the restrictions that make you slow and make your mana clunky. If we can make decisions centered around easing those difficulties, and have faith in the top of our deck, we’ll be rewarded more times than not.
Starting off easy, this is a classic A+B+C hand, and an easy keep. We’ve got disruption, lifegain from the herd migration, and 2 of our best threats. About as snap as a keep can get.
This is a hand I think most players new to the deck would mulligan, but it’s an extremely easy keep for me. We have perfect mana, multiple rampers, and a Clever Impersonator to clog up the board and delay a little bit. All this hand needs is a single threat to win the game, and we play 12. I’m keeping this in almost any matchup, play or draw.
Getting a little trickier — This hand doesn’t really have B (unless you count the lifegain from Herd Migration), but it’s got A+C. It’s functional, but very slow. I think this one really depends on the matchup and whether you’re on the play or the draw (I’m more inclined to keep on the play in a slow matchup because of the lack of velocity – but on the draw or in a faster matchup I think it’s a mull).
Here’s another hand that I think a lot of players might mulligan, but I’m pretty comfortable keeping. You have 2 clones in your hand, which makes comboing off much harder, but you still have A+B+C, and your cards are pretty flexible. We’ll be able to cast a leyline on turn 2 if we need to, and follow it up with a Clever Impersonator if we need to answer another threat. Sure, it might take us a bit to get up to 6 mana for the Carnosaur, but in the meantime we’ll be able to buy Keruga and draw some cards off of it (or just cast a Quint if we happen to draw one of those). We can also use the Carnosaur to keep pressure off it we’d like to do that. We’d rather have the Spark Double in our deck than in our hand for combo purposes, but it can still copy a dino (hippo or plain variety).
Of course, sometimes it’s very important to know your matchups and who won the die roll, so let’s look at some mulligan decisions from the Arena Championship where these factors come into play.
This hand looks very awkward. Again, we have 2 clones, which is not what we want to see, and our mana is far from perfect (the beanstalk needs to dodge a Thoughtseize for a few turns before we can grab our white). We’re completely lacking in the threat department.
Here’s where the matchup comes into play. We’re playing against a Thoughtseize/Duress deck. Initially, that makes this hand look even more sketchy, but you have to consider that a 6-carder, unless it’s near-perfect, will look even worse against such disruption.
It’s also important to know that Clever Impersonator is actually a very live card in this matchup – It can copy a Vein Ripper, an Archfiend, a Fable, or even a Bloodtithe Harvester in a pinch. That, plus being worried about going to 6 against a Thoughtseize deck, means that I think this, while being a below average 7, is still a keep.
Now most of the hands I’ve talked about have been “controversial keeps”, but I don’t want to paint the wrong picture — You definitely need to mulligan a decent amount with this deck. One matchup where mulliganing is more common is against Amalia, where you absolutely need to be able to interact in the early turns, or gamble on ramping out an early Quint.
This was my 7-card opener on the draw against Simonas Gervé in game 3 of our match, the only one featured on camera (This ended up being a fantastic game btw, check it out! https://www.youtube.com/watch?v=RHK9C9HrpdQ&t=1120s)
Normally I’d say this hand checks all the boxes, A+B+C. Your mana isn’t perfect, but it’s definitely functional, since we don’t care as much about access to blue or black mana in this matchup (Impersonator isn’t very valuable, we board out Gyrudas, and we don’t board in Thought Distortions). We have a ramper and a threat (though if we need to use Carnosaur as disruption, which is quite likely, we’ll lose our only threat).
Still, this hand is very slow, and being on the draw hurts us a lot. We also have lots more relevant interaction in postboard games between Bedecks, Leylines, and Quakebringers, and this hand has none of those. I had also seen Simonas’s list, and knew he had no way to answer a Quakebringer, so mulliganing semi-aggressively towards that was in the back of my mind. I mulliganed, and I think it was definitely correct.
Finally, let’s look at the hand that put me deepest in the tank – Game 2 on the draw in my Quarterfinals match against Kohei Kohiyama. (Here’s the video so you can watch me squirm: https://www.youtube.com/watch?v=8SGMbOba6sI&t=1s)
This is the definitional “A+C” hand. You’ve got great mana and not one, but two threats. Neither of your threats are a Carnosaur, so neither counts as interaction. This hand simply makes its land drops and eventually casts its threats. That’s a stronger gameplan than most might think, but it’s still a tick too slow on the draw. I mulliganed – Even in a Thoughtseize matchup, I think going to 6 with this hand is better than essentially scooping to a Sorin -> Vein Ripper start, since even if your opponent has a more disruptive and less pressure-filled start, you’re still in a pretty bad spot.
Still, I’m not 100% sure this was correct to mulligan. It’s that close.
Closing Thoughts
That final mulligan decision is emblematic of how it feels to play this deck. You don’t have nearly as many decision points in a game as a deck like Phoenix, Vamps, or Control, but the fundamental decisions like mulligans, mana development, and threat sequencing matter a lot, and are often the deciding factors in games. There often comes a point where you have to accept losing to a particular set of cards from your opponent, sometimes as early as your opening hand (this hand loses almost every time to a Sorin->Vein ripper start).
This is a deck that requires a LOT of faith that if you make the right decisions, you won’t win every time, but you’ll win enough for it be worth it.
Compared to something like RB Vampires, it can feel like you’re not exactly “in the driver’s seat” with Quint. Sometimes you’ll get run over, and feel helpless, and sometimes your opponent will tap out and you’ll immediately topdeck a Quint (sorry Jesse!)
Despite all of that, I think this deck has a deceptively high skill ceiling. Because you only have a small number of decisions every game, you can spend most of your time and energy on getting those decisions right. To do this, you need to be keenly aware of the range of threats & answers available in the format. You should constantly be asking yourself questions like “how many turns until I die?”, “what could they have that would change that clock?”, and “have they played as if they’re keeping up a certain specific answer this game?”. You need to memorize your mana requirements and be able to prioritize setting yourself up for different possibilities off the top of your deck depending on how the game is progressing. These are fundamental Magic skills that I think anyone needs to learn if they want to reach the highest levels, and I think this deck is a very good teacher of them, because of how directly punishing it can be to miss them — both during the game and while reflecting on the game, it can be easy to miss the tiny decision points that have the potential to make or break you.
Sometimes, you’ll be able to do the exact math on how likely it is that you kill them with your combo (usually, this means they’re tapped out and you’re casting Quint).
Much more often, you’ll know that the probability of a win is somewhere between 30% and 100%, but it will only get worse if you don’t act now.
Sometimes you’ll be able to narrow down their possible set of answers to 1 or 2 cards, and be relatively certain about the probability you can combo off safely.
Other times, it’s just a leap of faith.
You’ve got to have faith!!!!!!!!!!!!!!!
I have faith. Quintorius has faith. Do you?
Premium
Enjoy our content? Wish to support our work? Join our Premium community, get access to exclusive content, remove all advertisements, and more!
No ads: Browse the entire website ad-free, both display and video.
Exclusive Content: Instant access to all exclusive articles only for Premium members, at your fingertips.
Support: All your contributions get directly reinvested into the website to increase your viewing experience!
Discord: Join our Discord server, claim your Premium role and gain access to exclusive channels where you can learn in real time!
Special offer: For a limited time, use coupon code L95WR9JOWV to get 50% off the Annual plan!
Ryan is a longtime limited grinder & competitive player who recently qualified for the World Championships by getting 2nd place at Arena Championship 5. They are a regular on the 17Lands leaderboards and in the Day 2 draft queues at Arena Opens. They write Magic strategy articles at https://www.patreon.com/ryancmtg.