Welcome to my attempt at a guide that many have attempted but as far as I can tell none have completely succeeded in creating. Mostly, I believe, because Magic is a complex game that has many paths to victory. There isn’t one surefire method that can simply be copied into all situations. Each set of cards present different mechanics and archetypes that require unique strategies from players. So I am not proposing some sort of ‘perfect’ method in this guide. What I aim to accomplish is provide you, my dear reader, with a valuable set of knowledge and tactics that you will be responsible for accessing and applying during your next Draft, Sealed Event, or Ranked Match. What you will find below is a conceptual overview of the Limited formats, Deck Building tips, and Tactics (with examples) that most magic players take years to acquire (if they do at all). My goal is for this guide to be an objective tool, so as things come up that are more subjective I will make note of it and then move on. This will limit the scope of my guide but I want to create something that presents only facts.
Draft
In going over these formats I want to be as concise at possible, so please leave any questions you may have in the comments and I would be happy to answer them. Traditionally, draft is played with 8 players that each have three booster packs. The draft begins with each player opening one pack and selecting a card, then passing the rest to the left. You continue this for 14 selections (the number of cards in each pack). **Please note** on Magic Arena the basic land that is traditionally included in each pack is omitted, so in paper drafts you will see 15 cards but you can freely ignore the basic lands since they provide no benefit to draft. The second pack is then opened and everyone repeats the same process except cards are passed to the right (the third pack is passed to the left again). In total you will end up with 42 cards with which to build a 40 card deck. Keep in mind that about 17 of your 40 cards are going to be basic lands that you don’t need to draft. So, that means about 23 cards out of the 42 you selected need to be worthy of inclusion in your deck. Because of this you do not need to commit to a particular archetype or color(s) from the outset of the draft. Your first pick out of your first pack does not need to make it into your deck. But, there are a couple schools of thought on this. Some players will force a particular archetype when they draft and select the best card for that archetype each pick. This dramatically simplifies the draft, and requires these players to only know the best cards for one particular archetype. The advantage to this in addition to the simplification is that every pick will be the best possible card for that particular archetype, so no picks will be ‘wasted.’ The disadvantage is that the pool of cards seen by the drafter may not support the forced archetype very well. These types of drafters are relying on the packs to offer good cards for their archetype in addition to hoping that the other drafters do not pick the cards they are looking for.
The second school of thought is to keep your options open, at least until you see a couple cards out of the second pack. Usually this type of drafter will select the best cards for the first several picks regardless of archetype and pay attention to signals toward the end of drafting the first pack. These signals are the cards that are remaining after the packs wheel, or get all the way around the table. For example, you started the draft by picking 1 card out of 14 in your first pack. It is good practice to look at all of the other cards in the pack and try to remember them. When you see this set of cards again there will only be 6 left (8 players at the draft will have each taken 1 of the 14, remember we are ignoring the basic land in paper drafts). Try to judge what the six worst cards should be. If you get the cards back and there is a surprisingly good card remaining, it could mean that an archetype is open and few players are drafting it. It is ideal to draft an archetype that is open, as you will see more cards that support it as the draft progresses. You can also notice general signals by seeing how many cards are left that support each archetype as you receive each pack in the first round. It can also be rewarding to hold off on committing to an archetype because pack 2 could contain a bomb rare. One of the worst feelings in draft is to see extremely powerful cards that you cannot take because you have already committed to other colors.
decisions, decisions
Ultimately, neither school of thought is always correct. In some card sets there are not very many good cards to play in certain archetypes, so if you wait too long to commit to an archetype you may end up with too few strong cards and need to play some weaker cards in order to get to the minimum of 40. In some card sets there are certain archetypes that are much stronger than the rest, so forcing them may be worth it for that reason. However, if many drafters are forcing a particular archetype you may have a lot of trouble drafting cards for it. This is why in-person drafts tend to even out the playing field. If most players are forcing a stronger archetype, a weaker archetype might be extremely open and drafting it instead could lead to a much more powerful deck than fighting everyone for the same cards in the ‘stronger’ archetype.
On Magic Arena it is easier to force stronger archetypes because the bots are very 1-dimensional and are often more equitable in their selections as a whole. On the other hand, 1-dimensional bots send extremely strong signals so it is easy to tell what is open going into the second pack. Whichever school of thought you choose for your next draft, make sure it is purposeful. Drafting with intention and strategy will lead to a better deck than just seeing where the cards take you. If you are forcing, make sure you understand which cards are best for your archetype(s) before the draft begins. If you aren’t forcing, make sure you frequently reflect on the cards you have already selected and know when to commit (this takes practice). If you are struggling to make a selection between cards, try to choose the one that has the most synergy with cards you have already chosen. You also need to consider your mana curve, and it is often better to take a slightly worse card that improves your curve (more on that in a later section). I like to make a pile of cards I definitely want to play and a second pile of cards that might see play. By the end of the draft I know I have done well if there are at least 23 cards in the definitely play pile, and then I can potentially swap a few with cards in the secondary pile to improve my mana curve or composition.
Sealed
In Sealed there is no draft and instead the focus is on Deck Building. Instead of selecting cards, you are given six ‘sealed’ packs which you must open and make the best possible deck out of. Some players are negative about Sealed and claim that it requires less skill than Drafting. Regardless of whether or not that is true, Sealed most definitely requires players to have substantial knowledge about how different cards can work together and Deck Building skills. Sealed events ask you to analyze a pool of 84 cards and find the best 23 or so to make a 40 card deck. Traditionally, the best way to begin this task is to sort your cards by color and figure out which are your strongest. Most draft decks are strongest with two colors, but in sealed you will frequently see 3-color decks because most sealed pools won’t offer enough strong playables to play a two color combination without including several ‘filler’ cards. Often this third color is splashed, meaning there are fewer spells of that color in the deck but they are powerful enough to justify the addition. Most card sets include lands and/or artifacts that tap for multiple colors, which can help you build a mana base that can support all of your spells. 1, 4, or 5 color decks are also possible, but are much more rare. Once you figure out your strongest colors and whether or not you are able to splash for certain powerful cards, you can then start cutting the deck down to 40 cards. To do this well you must consider the type of deck you are creating and what ratio of creatures to noncreatures, mana base, and mana curve best supports that type.
Deck Building (Spell and Mana Ratios)
One of most important things to consider as you are deck building (and drafting) is your deck strategy. There are four primary strategies in Magic. While archetypes and synergy between certain cards is sometimes confused here, your deck will always fall into one of these four categories:
**Quick Note** Before going over each strategy I want to present a generic outline of deck composition. This way you have a means for comparison of each individual archetype.
Generic Composition – 17 Creatures, 6 Non-Creatures, and 17 Lands
Curve – 1-drops (0-2), 2-drops (5-8), 3-drops (5-7), 4-drops (2-6), 5+ mana (0-4), Cards that are cast off-curve (2-6)
Okay, so a couple things related to this outline. First, if you average them all you get about 23 spells, so that makes sense. Next, this illustrates the concept of mana curve. If you follow this outline the mana costs form a sort of curve, where most of your cards cost 2-3 mana and it tapers down from there. Most importantly, mana curve should be figured out based on cards you are actually going to play on that turn. So, combat tricks and counter-spells would usually be placed in the last category.
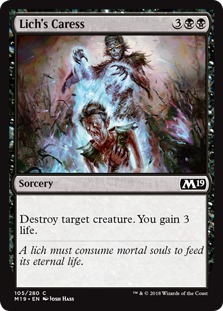
Removal spells are a little trickier. If they cost 4+ mana they will often be cast on curve, while cheap removal spells tend to be cast off-curve. For example, Lich’s Caress costs five mana and should be considered a 5-drop (your deck can’t support too many cards that cost this much!). Lightning Strike, on the other hand, costs just two mana but will rarely be played on your second turn. For that reason I suggest placing Lightning Strike in the off-curve category. Luminous Bonds is a little trickier and could more plausibly be considered a 3-drop, but it is probably safer to place in the off-curve category.
Here are a few more examples (I will use mostly Core Set cards to keep things fairly simple in this guide):
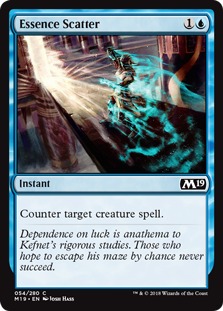
Bone to Ash should be considered a 4-drop as it can be cast on that turn unless there is a better option available, and a deck can only support a few 4+ mana cards. Divination should be considered a 3-drop because it is a good option on your third turn unless your opponent has necessitated a different line of play. Essence Scatter on the other hand should go in the off-curve pile. Sometimes it will be played on turn 2, but more often it is a spell that you will hold off on to counter a more powerful creature later.
The reason to classify spells this way is to increase the chances of your deck curving out, which means having something to cast each turn (except 1st). When you have nothing to cast 2nd or 3rd turn especially, you tend to start playing from behind and your chances of winning in that state are significantly lower. A significant mistake that players new to drafting will make is drafting many powerful cards and neglecting to take enough two or three drops. Since you will see at least eight cards by your second turn, 40/8=5 is a good minimum. While playing five cards that you can cast on second turn doesn’t guarantee that you will see one, chances are you will. As you will see below, aggro decks are designed to punish decks that do not fill out their curve properly. 1-drops are less important because these cards tend to be weak and become obsolete very quickly. Every set does have some good 1-drops such as Llanowar Elves or Goblin Motivator (from core set) which stay relevant longer, but 1-drops are generally bad picks in limited. Cards that cost 4 or more mana tend to be very strong, but resist the urge to pick too many of them at the expense of your mana curve. Now, let’s get into the archetypes and see where the variations come in.
Aggro – These decks want to end the game quickly, and are happiest with a low mana curve and fewer lands than usual. This means you want to have plenty of 2 and 3 drops to maximize your chances of ‘curving out,’ which is more important to aggro decks than any other strategy. A sample deck might look something like this: 17 creatures, 7 noncreatures, 16 lands
Your off-curve spells should primarily be removal and combat tricks in this archetype. These kind of spells allow you to keep attacking even after your opponent has played creatures that are stronger than your two and three drop creatures. Aggro decks want to empty their hand quickly and end the game before their opponent can empty theirs. This is a subtle form of card advantage that aggro decks can generate. Another common tool of aggro decks is evasion. Flying or unblockable creatures for example can allow aggro decks to continue attacking even in the later stages of the game. Another win condition for aggro decks is spells that can deal damage directly to their opponent.
Control – The alter-ego of aggro, control decks want to prolong the game in order to capitalize on value-generating and/or powerful but expensive spells. Where aggro decks are strongest early and then taper off, control decks gain strength over time. Control decks will usually play fewer creatures and favor a higher mana-curve. A sample control deck might look like this: 13 creatures, 10 noncreatures, 17 lands
Your off-curve spells should primarily be removal and counter-spells, as combat tricks are less relevant in an archetype that has fewer creatures. Notice there are still a decent number of creatures and enough two and three drops to consistently have early plays. This allows control to keep pace with aggro decks and eventually stabilize by playing powerful spells later in the game. Control decks usually win the game with powerful creatures, but can sometimes win the game by milling, or causing their opponent to run out of cards in their deck before them. These types of control decks can get away with running even fewer creatures. However, a mistake players new to control will often make is not running enough win conditions. It might seem reasonable to play many spells to disrupt your opponent/draw cards and rely on a couple bomb creatures to take down your opponent. But if your opponent has removal for those creatures you may find yourself in a situation where you cannot win. Regardless of deck type it is always important to consider how/when your deck wants to win the game and gear it to that end.
Midrange – This describes any deck that is a blend of aggro and control. Typically these decks have a medium mana-curve. Midrange wants to play creatures and spells that slightly outclass aggro decks, while still presenting sufficient threats to outpace control decks. Of all the strategies, more limited decks fall into this this one as it is difficult to find enough tools in most card sets to create a dedicated aggro or control deck. Creating an example midrange deck is sort of meaningless because there is so much variance.
Combo – True combo decks are almost never seen in limited, because they rely on very specific cards to create a game-winning interaction. In draft it is nearly impossible to draft combo pieces and reliably draw them. Sometimes players will think they are drafting a combo deck when in reality they simply have cards with synergy. It is important to understand the distinction and not to overvalue synergy at the expense of an overall strategy and mana-curve that supports it.
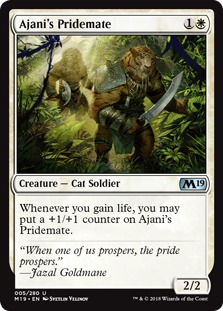
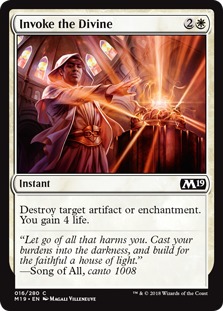
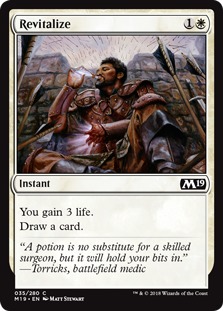
For example, someone may draft Ajani’s Pridemate and try to make a ‘life gain combo deck.’ In reality, Pridemate is a card that has synergy with cards that gain life, but it is important not to go overboard. It may be tempting to pick cards like Invoke the Divine or Revitalize to ‘power up’ your Pridemate, but this kind of thinking is problematic. First, while neither of those cards are unplayable, they are also not very strong on their own as Invoke requires your opponent to play certain cards and Revitalize uses up at least part of a turn just to gain 3 life. So, if you draw them without Pridemate you are at a disadvantage. Second, even if you draw Pridemate, he is very susceptible to removal spells and could leave you with a hand full of second-rate cards. Despite this, please keep in mind that synergy is a great thing to have! You just want to make sure your deck isn’t compromising itself too much in order to support a certain theme. If your deck does have a theme, you also want to try to acquire sufficient enablers and payoffs for that theme.
(Enablers above and Payoffs below)
It is great to build decks around powerful interactions like this. Drafting enough enablers and payoffs allows you to reliably draw some of both and support a life gain archetype. Understanding which archetypes are possible/best within a given card set is imperative to your success. I (and others) have created guides to help with each set. Once in a while there are card sets that defy conventional logic when it comes to deck building.
War of the Spark
For example, this very recently released (at the time I am writing this) set contains an unprecedented 36 planeswalkers. Up until this point, Planeswalkers were powerful rare cards that would only be seen in limited once in a while. But, in War of the Spark they appear in every pack. So, when drafting or playing sealed with this set you can expect your creature/noncreature ratio to be quite a bit different than what I outlined above (fewer creatures!). I am currently playing a lot of limited WAR and will be writing a guide in the coming week or two that will help illuminate how to build decks with that particular set. For now, I want to get into some general tactics that good players use to distinguish themselves regardless of which card set they are playing.
Maximizing Card Value
Good players are always thinking about the optimal way to play their cards and maximize the value they can get out of them. Here are a few examples:
Spell Utilization
No matter which set of cards you are drafting, there are certain types of spells that are always going to show up. Let’s start with a classic example:
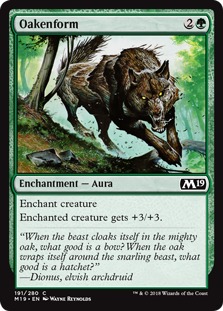
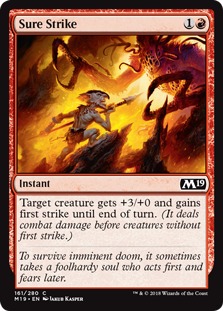
Shock has been and always will be a solid pick in Limited. To a beginner, it may seem strange that this is the case. It would take ten of them to kill your opponent, and it only kills 2 toughness creatures!? But to an expert player Shock embodies the important concept of utility. Where a beginner may trade their shock with an opponents’ creature early on, it is usually better to try to get more value out of it. Examples of this could be killing a creature as your opponent puts an enchantment on it such as Oakenform, or killing a creature in combat as your opponent uses a combat trick such as Sure Strike. In these situations you are generating card advantage by negating two spells with your one Shock. There are also opportunities to gain a tempo advantage by playing Shock in addition to something else on the same turn, taking advantage of its one mana cost. Shock can also trade with more valuable creatures, such as Snapping Drake. Finally, being able to target a Player or Planeswalker in addition to creatures with Shock allows players to find the place and time where it is going to have the greatest amount of impact.
Cards that provide options allow good players to distinguish themselves by figuring out the optimal way to use them (this is often called line of play). It can be difficult to discuss line of play in an objective way without using overly obvious or convoluted scenarios, but I do want to emphasize something. Many players will preach that card advantage is how you win games, while others might argue that tempo plays are superior because they can end the game before the card advantage is relevant. You have to keep in mind that card advantage and tempo are just tools, just like creatures and your life total are tools, that you use to win the game. The optimal line of play is the one that gives you the greatest chance of winning the game. In poker, expert players nearly always have a close approximation of their odds of winning a hand. Magic shares a lot of qualities with poker, as you need to consider the possible cards your opponent might possess in a given situation and figure out how those cards will interact with what is on the board. The best players nearly always take a line of play that gives them the highest chance of winning when considering these factors. This is something that we are all constantly getting better at as we play and reflect. Perhaps not everyone is capable of juggling all of the variables and doing those calculations at the highest level, but there are some more basic tactics that everyone can implement.
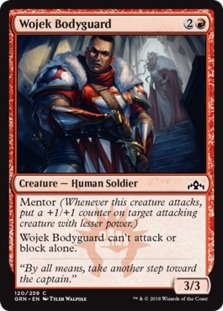
Sequencing Cards
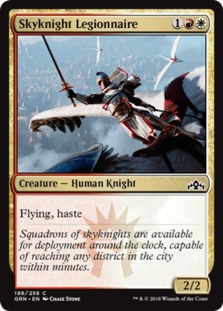
As we just discussed, there are many factors to consider when deciding the order in which you play spells, but the most fundamental is figuring what will have the greatest impact on the board. Take for example a situation above where you have two cards to play on your third turn. On average it is going to be better to play Wojek Bodyguard first. The reason for this is although you cannot attack on turn three, you will be attacking for 6 on turn four due to the mentor and haste abilities. The only reason not to do this is if your opponent has something on the board that blocks bodyguard without dying (or trades efficiently) and you want to get the 2 flying damage in with Legionnaire and slow play the Bodyguard. Just as in chess, it is important to extrapolate your play as far into the future as you can. This is one of the most important aspects to choosing lines of play. While you cannot anticipate exactly what your opponent has in their hand, you can still make general assumptions based on what colors they are playing. These assumptions can be enhanced by increasing your knowledge of the card set you are playing as well.
There is another reason to play Bodyguard first, but it is more subtle. Let’s say once you play Bodyguard it is the only creature on your board. Your opponent may think they have an extra turn to prepare since he cannot attack or block alone and play something greedy such as a draw spell (like divination) instead of a blocker or removal. You can then punish them for such a play with your haste creature on turn four. If you played Bodyguard after the Skynight Legionnaire, your opponent knows exactly what you are doing and could disrupt you in a few ways such as removing the Skynight Legionnaire so that your Bodyguard cannot attack the following turn. Even though better players will be familiar with the set and may anticipate that you are following up your Bodyguard with Legionnaire, these sort of tactics do often work against the average player. Let’s look at some more examples that further illustrate the concept.
Appear Weak when you are Strong, and Strong when you are Weak.
Bluffing is a very important aspect to playing Magic at a high level. It comes in a few different forms, but all them play on the expectations of your opponent. Just as in poker, it tends to work best on average players and less well on opponents of either extreme. Beginners play everything at face value and won’t understand the bluff, while expert players have a better chance of seeing through it. Let’s take a look at a few key examples and go over some tactics that may come in handy at your next event.
Bluffing Attacks
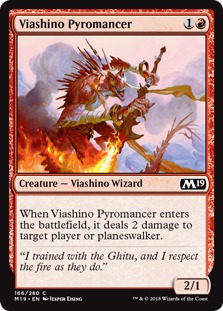
Let’s say your opponent plays Dryad Greenseeker on their second turn and you already have Greenwood Sentinel in play. While a novice player may just play their 3-drop and pass in this situation, I hope you see that there is no reason not to attack. Even though Dryad Greenseeker is a 1/3 and can easily block your 2/2, it is a valuable card. Your opponent will likely think you have a combat trick that you could use to trade with the Greenseeker. For this reason, most players will not block your Sentinel and take two damage, even if you do not have the combat trick. In addition to the immediate value, your opponent now suspects you have a trick and may play around it for the rest of the game. Keep in mind that a beginner may not understand the value of keeping Greenseeker alive and will probably block, while an expert may call your bluff in order to figure out if you have a combat trick, understanding that they won’t lose any card advantage even if you do. Sometimes it can be even more effective to attack when your creature will die if they block. Maybe you don’t have any way to get Viashino Pyromancer around Dryad Greenseeker and so bluffing an attack may be appropriate. There is risk involved, but often that is what will convince your opponent that you do have a trick, and the two extra damage could decide the game.
Baiting/Dodging Removal
Most novice players will play their most powerful cards every turn, but it is often better to take a more measured approach. In this format you are limited on powerful cards, so ideally you want to trade off your weaker ones with your opponents’ removal so that your stronger ones can stick. Let’s say your opponent passes their turn with some dreaded untapped islands in front of them. You should always remember that if you have an advantage on the board, you do not need to play anything. If you go through the attack phase dealing some damage and your opponent didn’t respond in any way, you can simply pass the turn. Sure, your opponent could have an instant speed draw spell or flash creature, so this isn’t always the best decision. But, by forcing your opponent to play something on their turn in order to take back board advantage you are giving yourself the opportunity to play anything you want without running into a counter spell on the following turn. This is another example of something where the correct line of play is always going to depend on the game at hand, but my advice here is to start paying more attention to times when you should be aggressive and times when should be patient. Don’t get frustrated when you make the wrong choice in a given game, simply learn from that situation. Even the best players that seem to take the best line of play every game at some point learned from taking all of the wrong lines.
Land Mind Games
Most players learn early on that if you top deck a land with nothing else in hand you should keep it in your hand. This is a good idea, because now your opponent isn’t entirely sure if you drew a spell or not. However, what about when you draw another land? Most players get frustrated, curse the mana flood gods, lay down the second land, and then pass the turn. But Expert players know not to do this unless there is something that they could top deck next which would require both lands to be in play. By laying down 1 of your 2 lands, your opponent is now pretty sure that the remaining card is also a land. This is where we can start playing with expectations. Maybe instead of drawing a second land, you instead draw an instant spell. In this scenario I would play the land that I have in hand and pass the turn in ‘frustration.’ Now my opponent is likely to think I have a land in hand and may make an aggressive play into my instant spell.
Another game you can play with your opponent is to leave specific mana untapped. This can bluff your opponent into playing around a counterspell or combat trick that you don’t actually have. At the highest levels of play this becomes a sort of mini game, where players are bluffing and double-bluffing each other to subvert their lines of play. Professional players have an extensive knowledge of cards so that they can recognize all of the potential spells their opponent may have. But this knowledge can also be exploited by those players by leaving specific mana untapped and playing in a way that suggests they have certain cards that they actually do not. This is similar to tactics used in Poker to fool your opponent into ‘putting you on’ certain cards and using that bluff to your advantage. Ultimately, expert players are able to read their opponents well and take ‘high percentage’ lines of play. This means they have an understanding of what cards their opponent could have and can also quickly calculate the probability that they actually do have those cards. Both of those skills require a lot of experience to master. To newer players, Magic (and Poker) may seem like relatively straightforward games that rely a lot on luck of the draw. But, as your understanding of the game increases you start to see all of the games within the game and can then begin the journey to becoming an expert. Luckily, there are some crucial tools that can help expedite your journey.
Knowing the other is Intelligence, Knowing yourself is True Wisdom
Both are important to becoming an expert at any game. In Magic it is important to know the cards. I would prioritize learning all of the instant spells in a given set, so that you know all of the things your opponent could respond with. After that, it is important to understand which cards have the most powerful interactions. On this blog I have created guides for every set of cards to help you find synergy between different spells and understand which are the strongest so that you can prioritize drafting them. This sort of knowledge is extremely valuable and can help you make stronger decks. But, there is a second sort of knowledge that is even more important, because those guides will not necessarily help you actually play your deck.
In chess, a Grandmaster will win against a non-Grandmaster nearly 100% of the time. While this game has some similarities to chess, it is not chess. You are going to lose at this game a lot, and that is okay! The average Magic player tends to blame bad luck if they do not win, or get really down on themselves if they make a bad play mistake. That sort of attitude is going to cause you to tilt and lead to more mistakes. It is true that some games are unwinnable, but it is well worth your time to be reflective. Should you have taken a mulligan (or kept)? Did your opponent make an unexpected play that led to them winning? Was there a line of play that you could have taken that might have led to a victory? Was there something about the way your opponent sequenced their cards that you could incorporate into your own play? Each game is an opportunity to learn something and grow as a player. If you blame your losses on luck or shut down when things don’t go your way, you are neglecting an opportunity and it will take you that much longer to become an expert.
Finally, there is an aspect to Magic that really defies a guide and that is your individual Bias. Some players are more prone to play Aggro, Control, or Combo Decks. In a perfect world you should play all of the different archetypes in order to round yourself out. This keeps your options open in draft, and helps you understand what your opponents’ decks are trying to do. But in a competitive scenario you may be more comfortable with a certain archetype and that is okay. Many Professional Magic players settle on two or three archetypes that they feel really comfortable with and try to draft one of those. If you play Control really well and struggle with Aggro, it isn’t a bad idea to figure out which archetypes support control and intentionally draft one of those over an Aggro archetype. In the end it is up to you to reflect on your own biases and play style, and decide the most successful course of action for yourself.
Closing Thoughts
Wow, this thing became way longer than expected. I still think it ended up pretty concise so there isn’t really a tl;dr. I hope those of you that did take the time to read found value in it. Please let me know what you think! As I stated in the beginning, my goal was to stick to the facts and try not to venture too far into subjective territory. It was a balancing act to do that while still trying to provide insights so if you think I stumbled at any point please let me know. As I mentioned in the guide, my next project will be a War of the Spark Overview which I will definitely roll out before WAR hits Ranked Draft on Arena (in about a week and a half). In the meantime, if you want to see me play some WAR Limited check out my stream (http://twitch.tv/compulsion02)!
Premium
Enjoy our content? Wish to support our work? Join our Premium community, get access to exclusive content, remove all advertisements, and more!
No ads: Browse the entire website ad-free, both display and video.
Exclusive Content: Instant access to all exclusive articles only for Premium members, at your fingertips.
Support: All your contributions get directly reinvested into the website to increase your viewing experience!
Discord: Join our Discord server, claim your Premium role and gain access to exclusive channels where you can learn in real time!
Special offer: For a limited time, use coupon code L95WR9JOWV to get 50% off the Annual plan!