Hey everyone! Today I’m going to be covering my Mardu Abiding Grace sacrifice deck in Historic which I recently used to go 17-3 with across 4 of the new constructed events on Arena. I posted an Abiding Grace sacrifice deck online a few months ago which I used to get top of the Arena ladder with and I think the Abiding Grace archetype got a slew of great additions.
With 3 new cards that this deck is running as 4-ofs, I definitely think this is the deck that has improved the most in Historic with the latest set and makes an already powerful deck even better! I’ve also put up a video on my YouTube channel with a full constructed event’s gameplay if you’re interested in seeing the deck in action.
Abiding Grace: This is the centerpiece of the deck and is here to enable us to repeatedly get back 1 mana creatures from the graveyard. The deck is basically made up of 1 mana creatures that provide a benefit when they die alongside a bunch of sacrifice outlets, so the idea is to play the 1 mana creatures, sacrifice them to the outlets to get advantage from both the creature dying and the sacrifice outlet itself.
We can then use Abiding Grace to get back the 1 mana creatures every turn to provide a constant source of sacrifice fodder which will create these insane value engines that are really difficult for the opponent to beat.
The lifegain option on Abiding Grace is nice upside, especially when you don’t have any 1 mana creatures in the graveyard to rebuy, but unless you’re worried about getting hit with burn spells our drained out by Cat/Oven, you’ll almost always want to use the option to get back your 1 mana creatures if possible.
Deadly Dispute: The draw two on Deadly Dispute is great at ensuring you don’t run out of gas and also helps to dig for whatever you need whether that’s lands, creatures to sacrifice, or additional sacrifice outlets.
The treasure token it produces is also nice to use for additional mana (as mana is often the main chokepoint once you have your engines set up) and you have other sacrifice outlets that care about sacrificing artifacts like Rite of Oblivion, Fatal Grudge, and other copies of Deadly Dispute so having treasures in play will allow you to use those outlets without needing to sacrifice a creature which can be very important in certain spots.
Rite of Oblivion: This is great as generic removal that you can use to take out any problematic nonland permanents the opponent has and you get two activations out of it because of the flashback. This is really important as it means the deck will be able to answer sticky threats that other sacrifice decks often struggle to deal with like bigger creatures that Fatal Push doesn’t kill, Planeswalkers like Teferi, Hero of Dominaria, and other random permanents like Solemnity against the Enchantress deck.
One of the advantages of running this card is that it can also be used to kill graveyard hate of any kind which is important since Abiding Grace is reliant on the graveyard and the death triggers on all of our 1 mana creatures gets shut off by a card like Rest in Peace.
The reason I’ve only got 3 copies in the maindeck is because it’s a card that can be clunky to draw in multiples, especially against decks that are slow to commit to the board like control, and if it’s the only sacrifice outlet you have access to, you can tend to run out of gas with it since it doesn’t produce card advantage like most of the other sacrifice outlets do.
Having the fourth copy in the sideboard is really important at dealing with graveyard hate though since it will be more prevalent games 2 and 3 and you’ll almost always be going up to the full 4 copies post-sideboard because of this.
Fatal Grudge: This is one of the new additions from Streets of New Capenna and I’ve been really impressed with it in this shell! You’ll predominantly be using this to sacrifice one of your creatures which will then force your opponent to sacrifice a creature and you get to draw a card so it also replaces itself.
The downside to this card is that the opponent gets to choose which creature to sacrifice if they have multiples which is obviously bad in situations where they have a big creature you want to kill alongside a smaller creature, but this deck has a lot of ways to pick off smaller creatures off cards like Shambling Ghast, Yawgmoth, Thran Physician, the devil token off Ob Nixilis, the Adversary, and Fatal Push after sideboard so you can usually set up a sequence where you can kill the smaller creature first and then hit their bigger one with Fatal Grudge.
You can also use Fatal Grudge to take out other permenant types too. One situation where this is very beneficial is being able to take out artifacts, especially graveyard hate like Unlicensed Hearse and Soul-Guide Lantern as you can sacrifice treasure tokens off Deadly Dispute or Shambling Ghast to kill their graveyard hate, draw a card and then get your graveyard back online again.
Being able to take out planeswalkers with Fatal Grudge is huge when that comes up too, I’ve had a few situations against Azorius Control where I sacrificed one of my copies of Ob Nixilis, the Adversary to Fatal Grudge to force the opponent to sacrifice their Teferi, Hero of Dominaria and draw a card which is such a good exchange!
Finally you can also use Fatal Grudge to take out enchantments in a pinch by sacrificing Abiding Grace. Since Abiding Grace is one of the most powerful cards in the deck you don’t really want to sacrifice it if you can afford to but against a card like Rest in Peace which shuts off the main ability of Abiding Grace, it can be worth it to get your graveyard back online again.
Ob Nixilis, the Adversary: This is another new card from Streets of New Capenna that fits perfectly into this shell. Since this deck is built around always having cheap creatures you actively want to sacrifice, you’ll almost always be able to pay the casualty on Ob Nixilis, the Adversary to get an additional copy and you’ll get a benefit from sacrificing the creature too.
The +1 ability is great at repeatedly applying pressure to the opponent’s life total as well as providing additional lifegain if you have a devil token in play off the -2 and can often win you the game on it’s own against the slower decks like control.
The -2 is great at protecting itself the turn it comes down as well as providing additional sacrifice fodder that provides a benefit when it dies. This means that if you have Ob Nixilis, the Adversary alongside another sacrifice outlet, you can casualty one of your 1-drops to get 2 copies of Ob Nixilis, the Adversary into play, -2 the higher loyalty one and now you immediately have access to another creature that you can use to sacrifice to your second outlet.
Ob Nixilis, the Adversary also goes a long way to improve the Control matchups which were typically the most difficult matchup for Abiding Grace decks in the past due to cards like Farewell and Divine Purge. Ob Nixilis, the Adversary survives both of them and is probably at it’s strongest in this matchup too since they don’t tend to apply much pressure to the board which allows Ob Nixilis, the Adversary to survive and freely tick up every turn.
Yawgmoth, Thran Physician: This is one of the strongest cards in the deck and if you can set this up alongside Abiding Grace it’s really difficult for any deck to beat. One of the weaknesses of running a very high synergy deck like this is that it relies on you having a good mix of sacrifice fodder and sacrifice outlets, and you can run into problems where you have a bunch of creatures, but you run out of outlets.
You’ll never run into this issue with a Yawgmoth, Thran Physician in play though because it’s a repeatable sacrifice outlet that doesn’t require any mana investment to activate and can be activated at instant speed. The fact it shrinks and kills the opponent’s creatures while also providing card advantage is insane and will usually take over the game if it’s left unchecked especially against opposing creature decks.
Don’t forget about the proliferate ability either as you can often pick off wide boards by putting individual -1/-1 counters on each of the opponent’s creatures and then using the proliferate ability to pick off their whole board. Even though it is one of the strongest cards in the deck, I’m only running 3 copies because it’s legendary and you don’t want to go too heavy on 4-drops in an otherwise low-curve deck or you might have to increase your land count otherwise.
Doomed Traveler: This is really nice as it essentially works as 2 creatures you can sacrifice for 1 mana since you get the 1/1 flying token when it dies. This is obviously great if you have multiple sacrifice outlets but it also pairs very nicely with Yawgmoth, Thran Physician as it provides two separate Yawgmoth, Thran Physician activations off one creature.
The fact the token you get has flying is very relevant too as it gives you a way to chump block against big flyers like Sprite Dragon and Crackling Drake against the Phoenix decks – if you can set up Doomed Traveler alongside Abiding Grace it allows you to create a 1/1 flyer to chump block with every turn which can really slow down the clock of the Phoenix decks. It can also be beneficial in matchups where the board is stalled on the ground and you can start generating a bunch of 1/1 fliers to force damage through in the air.
Cursebound Witch: This provides us cards from its spellbook when it dies which is typically worse than just drawing cards, but the spellbook does have reasonable cards for each stage of the game and you can produce a ton of additional value off this if you’re looping it with Abiding Grace. I’ve gone over all of the options in the spellbook below to give you an idea of when you should be looking to pick them:
Witch's Cauldron: Since this works as a repeatable sacrifice outlet that generates card advantage it can be a great pick in slower or grindier matchups but is typically too slow against faster decks.
Witch's Vengeance: This is the only removal spell in the spellbook so is pretty high on my pick order if the opponent is running smaller creatures that this can kill. This is obviously insane against tribal decks like Humans and Merfolk etc so it can be beneficial to prioritise sacrificing Cursebound Witch to try and hit this in those matchups but even using this to kill a single creature can be reasonable in certain situations.
Witch's Oven: If you need additional lifegain or have a lot of creatures but not many sacrifice outlets then this can be a good pick, especially if you have Abiding Grace in play. Also prioritise taking this if you already hit a Cauldron Familiar off a previous spellbook activation.
Witch's Cottage: This will usually be entering tapped but is still a good pick if you just need to hit a landdrop for the turn – avoid otherwise.
Witch's Familiar: Probably the worst creature in the spellbook but can still be the right pick if you need a creature to sacrifice and the other options aren’t good either.
Curse of Leeches: This is a good pick in grindy matchups that you expect to take a long time like control or matchups where you want additional lifegain but is usually too slow against faster decks.
Cauldron Familiar: This is a good pick if you need sacrifice fodder and should be a priority if you already a Witch's Oven off a previous spellbook activation.
Black Cat: One of the better creatures in the spellbook so this is a good pick if you just need a creature to sacrifice. If the opponent is empty-handed, you can sacrifice this during their draw step to force them to discard their card for turn – don’t forget to set a stop to do this.
Sorcerer's Broom: In most cases this is an ok creature to take if you need sacrifice fodder but if you can get additional value off this in very long games.
Bloodhunter Bat: This is very overcosted, but can be reasonable to take if you need a flying blocker or you need to force through the last few points of damage.
Unwilling Ingredient: This is the most efficiently-costed creature in the spellbook so if you need sacrifice fodder this is usually the best pick.
Expanded Anatomy: This is the worst card in the spellbook. There might be some very corner-case scenarios where you can boost the power of a flyer to win but outside of that you should basically avoid at all costs.
Cruel Reality: This is a pretty decent card in the late game but it’s not worth speculating on early unless you have access to the mana to cast it.
Torment of Scarabs: This can be reasonable against a slower deck like control or if you’re already pretty ahead but isn’t great it most other situations.
Trespasser's Curse: This is very matchup dependant. It’s great against opposing sacrifice decks, and other go-wide decks like Goblins.
Shambling Ghast: The flexibility you got off the death triggers on this card is great and both modes are very useful. The -1/-1 ability is great at picking off smaller creatures and also works well in conjunction with Yawgmoth, Thran Physician to take out bigger creatures too.
The treasure it creates is also really nice at both ramping us in the early game, providing additional mana later as well as providing a sacrifice outlet that we can use for Deadly Dispute, Rite of Oblivion and Fatal Grudge.
Unlucky Witness: This is the last new addition to the deck from Streets of New Capenna and this feels like the best 1 mana creature in the deck to me. Not only does it provide card advantage when it dies, but it also provides card selection!
The only downside of Unlucky Witness is it’s not great to sacrifice in the early game during your turn as you’ll only be able to cast the cards you exile that turn, but if you’re using an instant-speed sacrifice outlet during the opponent’s turn or you have additional mana available, it’s the best 1 mana creature to be sacrificing.
Unless you need a flying token to block off Doomed Traveler or you need multiple Yawgmoth, Thran Physician activations during the opponent’s turn (in which case you should prioritize Doomed Traveler or Shambling Ghast) then Unlucky Witness is the card you should prioritize getting back with Abiding Grace as it just produces so much card advantage if you can rebuy and sacrifice it every turn cycle.
Notable Exclusions:
Before I go over the manabase I wanted to address some cards that I’m not running and were in my previous build, namely Cat/Oven and Ravenous Squirrel.
Cauldron Familiar + Witch's Oven: This was nice to have in the deck as it provided a way to apply regular pressure to the opponent’s life as well as providing repeated lifegain which is important in certain matchups. I don’t really feel it’s necessary anymore because Ob Nixilis, the Adversary does a very similar thing while only taking up 4 slots in the deck and synergizing a lot better with the overall gameplan.
The other big reason I wanted to cut Cat/Oven from the deck was that neither of the cards were individually that good when you didn’t have the other. Cauldron Familiar without Witch's Oven is an ok 1 mana creature to sacrifice, but if you’re getting it back with Abiding Grace every turn, your Abiding Grace is essentially working as a 3 mana Witch's Oven which isn’t great.
On the flip side, Witch's Oven without Cauldron Familiar is even worse as it contributes to a lot of hands you have to mulligan – having Witch's Oven alongside just sacrifice outlets or Abiding Grace is a mulligan and even having Witch's Oven alongside 1 mana creatures that aren’t Cauldron Familiar and no other sacrifice outlets is pretty bad because you don’t really get much advantage off the food tokens.
Like I said previously, one of the problems with running a very high synergy deck like this is that you need a good mix of creatures to sacrifice alongside sacrifice outlets which can result in mulligans if you don’t hit a good mix, and I felt like having Cat/Oven in the deck made that problem a lot worse.
Adding a third colour will also add to additional mulligan issues so I wanted to make sure the rest of the deck was as streamlined as possible to avoid this and with the additions from Streets of New Capenna, I don’t feel like Cat/Oven is necessary anymore. Finally, cutting Cat/Oven also makes the deck slightly less vulnerable to graveyard hate which is beneficial too.
Ravenous Squirrel: My previous build was also running Ravenous Squirrel which was a nice sacrifice payoff but I’m not really a fan of it in this shell anymore for a few reasons.
First of all it’s not great to sacrifice; I wanted to really focus on making sure you have a good mix of creatures that are good to sacrifice alongside sacrifice outlets as often as possible to avoid mulligans, and hands with Ravenous Squirrel as your only creature were always a bit awkward because you get no benefit when it dies.
One of the ways to mitigate that in the old build was that you could splash green to activate the effect so Ravenous Squirrel worked as a creature to sacrifice if you needed, but also acted as a sacrifice outlet itself, albeit a slightly expensive one. Since I’m now running red and there’s a lot more pressure on the manabase, you can’t do that anymore.
I also think that most decks in the format are pretty well set up to be able to chump block a big Ravenous Squirrel every turn, even control can produce tokens off The Wandering Emperor and Shark Typhoon and I’m not running The Meathook Massacre in the main to force damage through so I didn’t feel like Ravenous Squirrel just as a big creature was that well positioned either.
Manabase:
This is the first deck I’ve posted in a very long time that isn’t running any basics or utility lands which is something I’m not normally keen on, but the addition of red to the deck does put a lot of pressure on the manabase. With Field of Ruin still being played in the format, I almost always run a single basic land in order to not have my lands simply destroyed by it, but since the deck now needs white, black and red mana on turn 1, I felt like you had to be running all dual lands to consistently have the colours you need.
Additionally, you also need white/black for Rite of Oblivion and red/black for Fatal Grudge on turn 2 which puts even more strain on the manabase. As I’ve said, this deck will often have to mulligan hands with creatures and no sacrifice outlets or sacrifice outlets and no creatures, so I wanted to ensure that you don’t also have to mulligan because you don’t have the right colours.
Running all 22 dual lands has definitely felt consistent enough to me and I very rarely have to mulligan because I don’t have the right colours. This is also the reason why I’m not running a card like Phyrexian Tower which is usually great as it enables turn 2 Abiding Grace but it’s absolutely felt worth it to have the colours you need more consistently.
4 Fatal Push: There are a lot of cheap creatures in the format that snowball the game if they’re not killed quickly like Kor Spiritdancer, Sprite Dragon, Dreadhorde Arcanist etc so having access to additional single-target removal post-sideboard is really important. You can also trigger revolt very easily because of all of the sacrifice outlets.
1 Unlicensed Hearse & 3 Soul-Guide Lantern: Graveyard hate is very important in Historic right now because of decks like Izzet Phoenix, Greasefang & Rakdos Arcanist so these are very important tools in those matchups. Unlicensed Hearse is another new card from Streets of New Capenna and I’ve actually preferred it to Soul-Guide Lantern so far.
Exiling two cards from the graveyard each turn cycle is good enough to shut off basically all the important graveyard synergies, unlike Soul-Guide Lantern it’s not single-use so can shut off the graveyard for the whole game, and it also turns into a huge creature you can win the game with later on as well. The only real downside of Unlicensed Hearse is it’s pretty bad in multiples which is why I’m only running 1 copy and 3 additional Soul-Guide Lantern which you can cycle away if you draw in multiples.
1 Rite of Oblivion: Fourth copy of Rite of Oblivion which is almost always brought in games 2 and 3 as a way to deal with graveyard hate. This is also really nice against decks that rely on artifacts and enchantments like Golgari Food, Selesnya Enchantress and Affinity.
2 The Meathook Massacre: This is very useful against both go-wide aggressive decks as well as decks where you want additional lifegain. It’s also important against other sacrifice decks to slow down the drain from Cat/Oven and Oni-Cult Anvil as well as being a card you can bring in if you want to speed up your clock as the additional 1 damage every time you sacrifice a creature off this closes games out a lot faster.
Honestly this deck is very difficult to port to best of 1 but if I had to, I would make no changes to the main deck. The main reasons why I think it’s hard to port to Bo1 is a combination of the deck being very synergy-based (so any changes you make to the main deck will hurt the overall consistency of the deck) and there being a lot of best of one decks that require very specific answers that you wouldn’t typically want to run in the main deck.
For example, the all-in graveyard-based combo decks like Dragonstorm, Greasefang, Okiba Boss, and Reanimator would all want you to be running cards like Thoughtseize and Unlicensed Hearse/ Soul-Guide Lantern in the main deck, but running those cards in Bo1 would hurt the overall consistency and therefore make you generally worse against all other matchups.
These graveyard-based combo decks are pretty much exclusive to best of one and are also probably the worst matchup for this deck so if you do run this in best of one, I think you’ll just have to accept that you have a bad matchup there as I don’t think it’s worth changing the deck just for those matchups as it’ll make you worse against everything else.
Ob Nixilis, the Adversary can be actively bad in this matchup as it gives the opponent a way to discard Arclight Phoenix and set up delirium and they’re also very good at pressuring planeswalkers.
Yawgmoth, Thran Physician is also typically too slow here as you need to take out cards like Sprite Dragon and Dragon's Rage Channeler before turn 4 and having to repeatedly pay life to kill creatures is dangerous in this matchup. So we cut both of those and a couple of Cursebound Witch (which is the weakest 1 mana creature in this matchup) for additional removal and graveyard hate.
In general you’ll want to try and use your removal on their non-Phoenix threats and use your graveyard hate to shut off Arclight Phoenix and delirium whenever you can. Sacrificing Doomed Traveler to produce 1/1 flying blockers is very useful at helping to stabilise and you should typically use Fatal Push before your other removal like Rite of Oblivion and Fatal Grudge as Fatal Push can’t kill Stormwing Entity.
They are likely to bring in Anger of the Gods against you so if they aren’t committing to the board early on then try and hold up instant speed sacrifice outlets like Deadly Dispute wherever possible to mitigate the damage Anger of the Gods does.
This is a matchup where Fatal Grudge is pretty bad since the opponent can simply sacrifice Cauldron Familiar to it and then bring it back with food tokens. In theory, it can be nice to kill Witch's Oven by sacrificing a treasure token, but if the opponent has any excess food tokens in play, they can sacrifice those instead so we cut Fatal Grudge here.
This is a very grindy matchup and can often go long so try to play slightly faster than usual if you can as you can lose to timing out if you’re not careful. Rite of Oblivion is the card that gives us the biggest advantage in this matchup as we can take out all of their key engine pieces with it as well as getting two activations because of the flashback. We don’t have as many ways to gain life as them since we’re not running Cat/Oven so be wary of your lifetotal – it can often be a good idea to get The Meathook Massacre or Ob Nixilis, the Adversary early to help mitigate this.
Yawgmoth, Thran Physician isn’t great in this matchup since they’ll usually have very few creatures in play, and while Fatal Grudge taking out Planeswalkers is a nice exchange, it will often do nothing other than draw a card in the early game. Thoughtseize is great at both clearing the way to set up our engines as well as getting rid of problematic cards like Teferi, Hero of Dominaria and Rest in Peace.
The fourth Rite of Oblivion is very important here for taking out graveyard hate as well as being a good answer to their planeswalkers and The Meathook Massacre as a one-of is nice at increasing our clock to close the games out faster.
Ob Nixilis, the Adversary is usually the best card in this matchup so focus on getting that into play as soon as possible. Resolving Abiding Grace is also really powerful in this matchup so definitely prioritise getting that into play if the opponent’s shields are down.
This matchup will come down to whether you have more answers than they have creatures as if you can take out all of their creatures, then their deck basically does nothing. You typically have a big advantage because of the amount of interaction you have, but you should still play very conservatively in the first few turns to ensure they don’t get a creature to stick.
Even though Yawgmoth, Thran Physician can be nice at picking off creatures, it’s typically too slow in this matchup as their big creature will very quickly outscale Yawgmoth, Thran Physician ability to deal with it.
Even if they do get a creature to stick, this deck can chump block very effectively, Doomed Traveler can also produce spirits to chump block in the air even if they have Arcane Flight so you can usually buy enough time to dig for another removal spell.
This should be a good matchup overall as it’s very difficult for them to interact with your value engines once they’re online and your creatures line up well against their removal because of all the death triggers. How much graveyard hate you should bring in will be very depending on their exact build so pay attention to what they’re running game 1 – if you see multiple cards like Kroxa, Titan of Death's Hunger then you might want more graveyard hate whereas other builds might not interact with the graveyard at all outside of Dreadhorde Arcanist.
They will probably bring in Hidetsugu Consumes All against you which isn’t a big deal if you already have Abiding Grace in play as you can get back a 1 mana creature before it exiles the graveyard, but be wary of running out too many 1 mana creatures if you don’t have a good way to recover from Hidetsugu Consumes All as you don’t want to be left with no sacrifice fodder.
Thankfully, we’re running a lot of interaction so you can usually take out their creatures before it’s an issue but do think carefully before using Rite of Oblivion as they tend to run very high numbers of graveyard hate so ideally you’ll want to use other removal on their creatures first and save Rite of Oblivion to deal with graveyard hate or cards like Shadowspear and Nettlecyst.
Always kill Sterling Grove immediately as if they get a second copy in play, it will stop you from interacting with any of their enchantments. Even if they do get the Nine Lives + Solemnity lock up and you don’t have an answer, you can still win through either the +1 on Ob Nixilis, the Adversary or some of the curses from Cursebound Witch.
In general, you want to focus on taking out their lifegain enablers like Soul Warden as this will prevent their Voice of the Blessed and Trelasarra, Moon Dancer from growing as well as keeping them off the combo. Rite of Oblivion gives you ways to interact with their Heliod, Sun-Crowned and Ajani's Welcome and the creature removal should be able to deal with everything else so this should be a good matchup overall.
They could potentially bring in Yasharn, Implacable Earth against you which is actually very difficult to beat so if you get ahead, always try and hold up a way to trigger revolt (like a treasure token) and Fatal Push to be able to deal with it the turn it comes down. Also always be wary of Collected Company as they can combo off from an empty board if they hit 2 pieces of the combo off Collected Company and have the third in hand.
Since they run very few creatures and the ones they do run are pretty big, Yawgmoth, Thran Physician isn’t that effective in this matchup. Similarly, Fatal Grudge can be lacklustre if they don’t commit to the board early but I still like keeping some in to deal with a turn 2 Territorial Kavu.
Unlike most decks, Niv can interact with your engine cards like Abiding Grace because they run cards like Maelstrom Pulse and Vanishing Verse so Thoughtseize is especially important here at clearing the way to set up. Niv-Mizzet Reborn is also a card that we can deal with once it’s in play, but the advantage it provides can get them straight back into the game or can even pull them ahead in some situations so that should be a priority to take with Thoughtseize.
Overall the gameplan here is to outgrind them with your value engines as they don’t tend to close the game out quickly but make sure to hold onto answers for Territorial Kavu and Niv-Mizzet Reborn too. Culling Ritual and Hidetsugu Consumes All are both cards to be wary of so try not to commit all of your creatures to the board if it will leave you with no sacrifice fodder if they sweep the board – thankfully Abiding Grace survives both of those cards so try and get Abiding Grace into play as soon as possible to avoid getting blown out.
This should be a good matchup overall due to the amount of removal and interaction you run. The key here is to kill their creatures as fast as possible to keep them off Embercleave as a resolved Embercleave is very difficult to beat. The Meathook Massacre can often win the game on its own if you’re able to sweep their whole board so saving treasure tokens for an early The Meathook Massacre is often a good idea.
Tips & Tricks
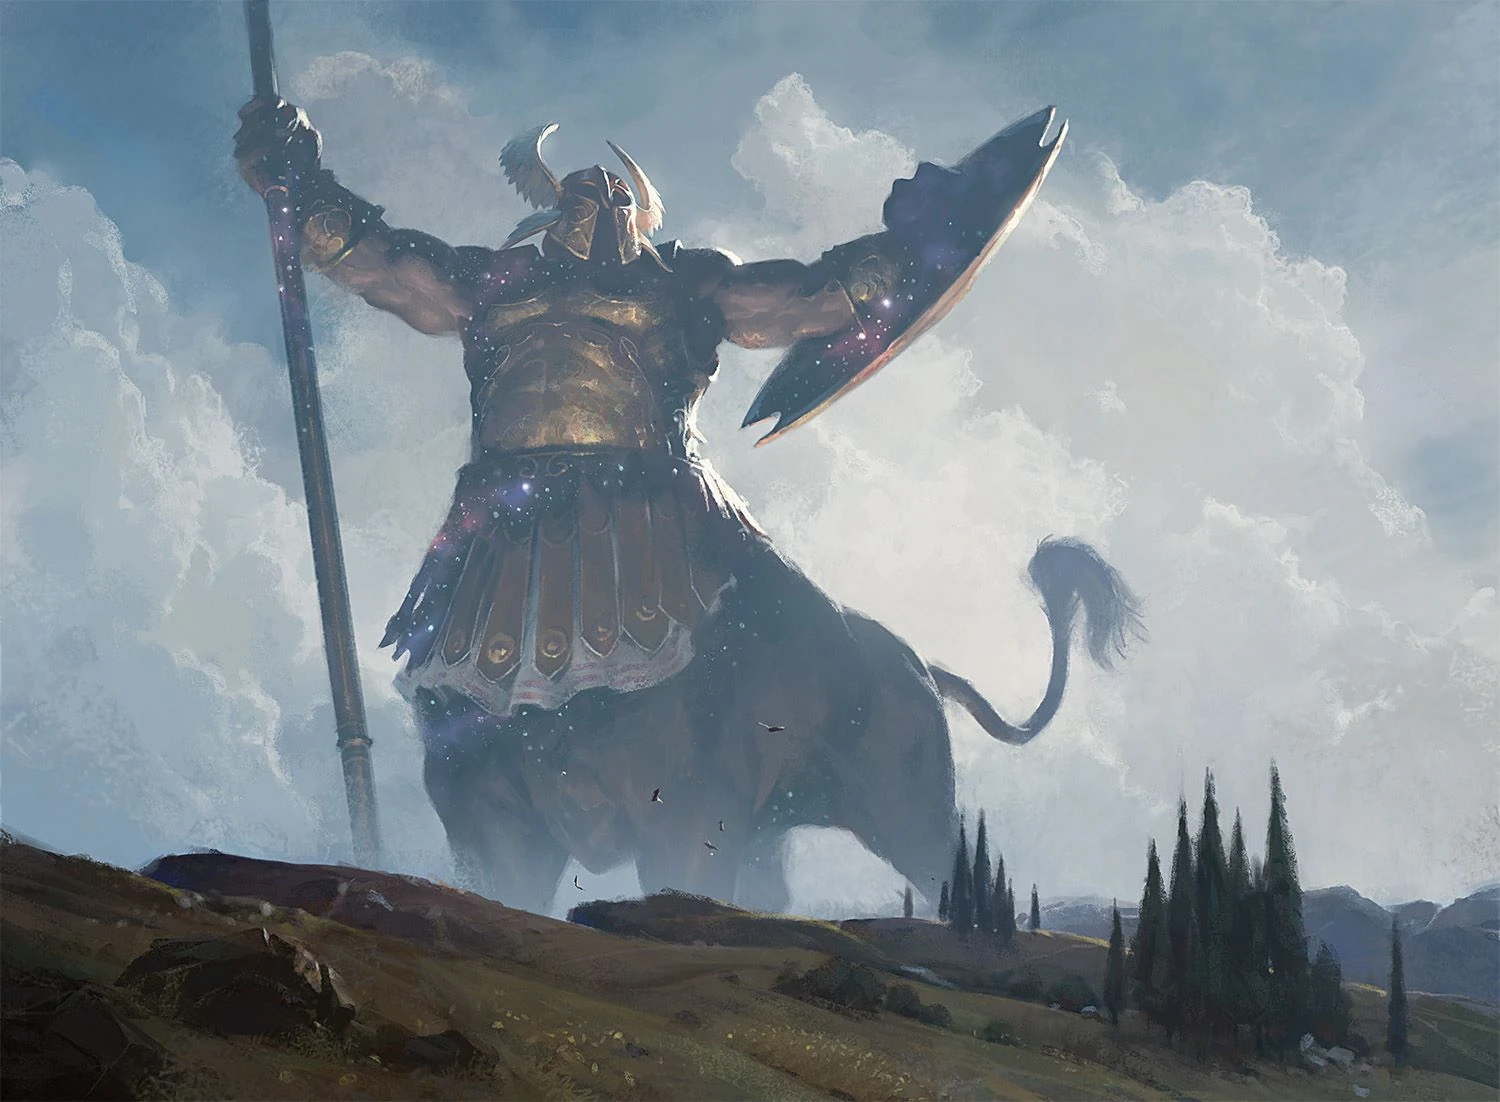
Rite of Oblivion Art by Martina Pilcerova
Don’t forget you can sacrifice any permanent to cast Rite of Oblivion, not just creatures.
You can set a stop to hold priority in the end step after Abiding Grace has resolved. For example if the opponent has a 2 toughness creatures, you can sacrifice a Shambling Ghast during your main phase to give it -1/-1, bring it back with Abiding Grace and then sacrifice the Shambling Ghast again before your turn ends to give it -1/-1 again.
Don’t forget that you can hit Witch's Cottage (if you need land) and Witch's Vengeance (if you need a sweeper vs tribal decks) off Cursebound Witch which are probably the most impactful cards you can get off the spellbook in certain scenarios so don’t be afraid to prioritise sacrificing the Cursebound Witch to hit those if you need.
The turn you play an Ob Nixilis, the Adversary with casualty, if you plan on making a token with one and ticking up the other, always make sure to make the token first as you’ll gain an additional 2 life off the +1 since you now have a devil in play.
Unlicensed Hearse can work well as a blocker to pick off a bigger creature – you can crew it, declare a block with it and then exile two cards from a graveyard to make it even bigger before damage is dealt.
Don’t be afraid to cast The Meathook Massacre for X=0 in order to close the game out faster if you have a good board established already.
Don’t forget that Yawgmoth, Thran Physician has protection from humans. This is obviously great against the humans deck but there are also a lot of other commonly played cards in the format that happen to be humans so always check the opponent’s card types when you have Yawgmoth, Thran Physician in play.
Conclusion
Abiding Grace sacrifice is one of my favourite decks to play and I feel like the deck has got some real improvements with the latest set and is a real contender in the format so definitely give it a try if sacrifice is your thing. Thanks a lot for reading!
Premium
Enjoy our content? Wish to support our work? Join our Premium community, get access to exclusive content, remove all advertisements, and more!
No ads: Browse the entire website ad-free, both display and video.
Exclusive Content: Instant access to all exclusive articles only for Premium members, at your fingertips.
Support: All your contributions get directly reinvested into the website to increase your viewing experience!
Discord: Join our Discord server, claim your Premium role and gain access to exclusive channels where you can learn in real time!
Special offer: For a limited time, use coupon code L95WR9JOWV to get 50% off the Annual plan!
Alth is an MTG Arena grinder who has been #1 on the ladder multiple times and is always looking to bring new ideas and archetypes to the format and push them to the top spots on the ladder. You can follow him on Twitter and YouTube.